
How to Design Packaging: From Dieline to Print-Ready Production
 Yifan Zhao9 min de lectura ·
To design packaging professionally, start with the product requirements, use a manufacturer-approved dieline, build the visual system around the structure, test it at full size, and prepare print-ready artwork before production. Good packaging must work not only on screen, but also through folding, printing, finishing, and manufacturing.
The challenge is that small production mistakes can ruin a strong concept. Incorrect bleed, unsafe text placement, cross-panel misalignment, color variation, and unverified dielines often create costly revisions, especially when teams manage multiple SKUs and repeated design changes.
Virse helps design teams move faster by combining AI generation, visual collaboration, and multi-model workflows in one workspace. Paid plans include unlimited use of 40+ models such as Nano Banana 2 and GPT Image 2 with unlimited seats, while new users receive free credits that can generate up to 10 Nano Banana 2 images or one Seedance 2.0 video. Seedance 2.5, Seedance 2.0, and MiniMax H3 are also available on the Virse model page.
How to Design Packaging Step by Step
A professional packaging workflow should follow a clear sequence:
- Define the product, customer, and production requirements.
- Confirm the packaging material and print method.
- Obtain the manufacturer-approved dieline.
- Map the information hierarchy across each panel.
- Create the visual system.
- Apply artwork to the production dieline.
- Build digital mockups.
- Print and assemble a full-size prototype.
- Prepare print-ready artwork.
- Complete printer preflight.
- Review and approve proofs.
- Inspect early production output when possible.
Packaging design works best when structure, graphics, and production are treated as one connected system.
Define product and production requirements first
Before creating visuals, confirm:
- Product size and weight
- Packaging type
- Number of SKUs
- Retail or e-commerce context
- Regulatory and barcode requirements
- Production volume
- Finishing requirements
- Supplier specifications
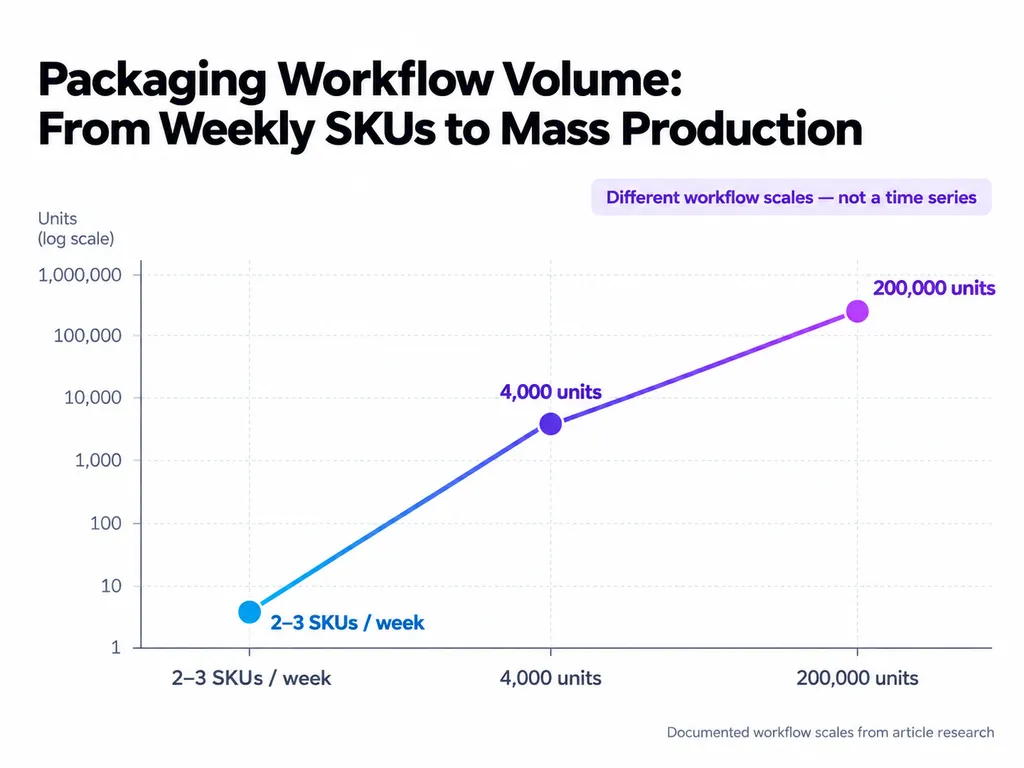
Our research identified packaging roles producing roughly two to three new SKUs per week. At that pace, one-off layouts quickly become inefficient. Designers need repeatable rules for structure, hierarchy, and variant changes.
Choose the packaging material and print method early
Materials affect both structure and artwork.
Paperboard, corrugated board, labels, and flexible packaging behave differently during printing, folding, finishing, and assembly. The selected material can affect color appearance, crease behavior, coating, ink choice, and structural tolerance.
Material decisions should therefore happen before final artwork, not after it.
How to Create a Packaging Dieline Correctly
A packaging dieline is the flattened structural template showing how the package will be cut, folded, glued, and assembled.
A dieline may include:
- Cut lines
- Fold or crease lines
- Panels
- Flaps
- Glue tabs
- Bleed
- Safe areas
- Windows
- Perforations
- Finishing zones
For commercial production, the final dieline should normally be supplied or approved by the printer, converter, or manufacturer.
Can you create your own packaging dieline?
Yes, especially for concept development and prototypes.
One case in our research involved physically opening an existing carton, measuring each panel, rebuilding the structure in Illustrator, test-cutting it, and refining the result. For an experienced operator, some moderately complex structures could be reconstructed in about one hour.
That is useful for reverse engineering. It does not make the file automatically production-ready.
Material thickness, equipment, glue areas, and folding tolerances can all change the final specification. Use self-built dielines for testing, then validate them with the supplier before production.
How to Design Packaging Artwork for Bleed, Safe Areas, and Folds
Packaging artwork must tolerate small physical variations.
Design bleed and safe areas around printer specifications
Background colors and images that reach the package edge should normally extend into the bleed area. Logos, barcodes, and important text should remain inside the safe zone.
There is no universal bleed value for every package. Use the printer's specification rather than a generic default.
Avoid fragile cross-panel alignment
Graphics that cross folds can look impressive but create production risk.
Avoid placing:
- Faces directly on folds
- Small text on crease lines
- Logos that require perfect panel alignment
- Thin graphics that visibly break with small shifts
A flat file can be mathematically perfect while the assembled package is not. Packaging must be designed for physical tolerance, not pixel-perfect output.
How to Build a Packaging Design System for Multiple SKUs
A scalable packaging system separates fixed brand elements from variable product elements.
Fixed elements may include:
- Logo position
- Typography
- Grid
- Information hierarchy
- Photography style
Variable elements may include:
- Product name
- Flavor
- Color
- Size
- Variant imagery
- Feature callouts
This is especially important when a brand grows from a few products to dozens.
Instead of redesigning each package independently, define rules for what stays consistent and what changes. A strong packaging system helps customers recognize the brand while still distinguishing each SKU.
How AI Can Improve the Packaging Design Process
AI is most useful when it accelerates exploration and repetitive execution.
Useful applications include:
- Moodboards
- Reference analysis
- Visual style exploration
- Product imagery
- Illustration
- Patterns
- Color variations
- SKU adaptations
- Mockups
- Marketing assets
AI should not replace:
- Structural engineering
- Manufacturer-approved dielines
- Prepress
- Color proofing
- Regulatory review
- Production approval
The strongest AI workflow keeps the designer in control of structure, brand logic, and production decisions.
Virse follows this collaborative model. Its canvas-based workflow allows teams to organize references, generated assets, and design outputs in one shared environment, while multiple agents can work across different parts of a creative project with shared context.
For packaging teams, this can reduce fragmentation when the same concept needs to become multiple SKUs, product imagery, campaign visuals, and downstream marketing assets.
How to Test Packaging Design Before Production
Digital mockups and physical prototypes answer different questions.
Method | Best For | What It Validates |
|---|---|---|
Digital mockup | Concept review | General visual appearance |
3D render | Presentation | Form and shelf visualization |
Physical prototype | Design validation | Scale, folds, hierarchy, assembly |
Printer proof | Pre-production | Artwork and print interpretation |
Press check | Large production runs | Real press output |
Why full-size physical prototypes matter
Print the design at 100% scale, cut it, fold it, and assemble it.
Check:
- Is the product name readable?
- Is body text too small?
- Do folds interfere with information?
- Is anything upside down?
- Are cross-panel graphics acceptable?
- Does the opening sequence make sense?
Our research included a packaging specialist with about 20 years of design experience, including 12 years focused on freelance packaging, who still built physical prototypes.
That is an important lesson: physical prototyping remains valuable even for experienced designers.
How to Prepare Packaging Design for Print
Before exporting final artwork, obtain the printer's specifications.
Packaging prepress checklist
Confirm that:
- The approved dieline is being used.
- Bleed and safe areas are correct.
- Images meet resolution requirements.
- CMYK or spot colors are configured correctly.
- Pantone colors are defined correctly when required.
- Foil, varnish, embossing, or white ink use the correct layers.
- Barcodes are scannable.
- Fonts and linked assets are handled correctly.
- Legal information is current.
- The final file format matches the printer's workflow.
A visually correct PDF can still be technically wrong.
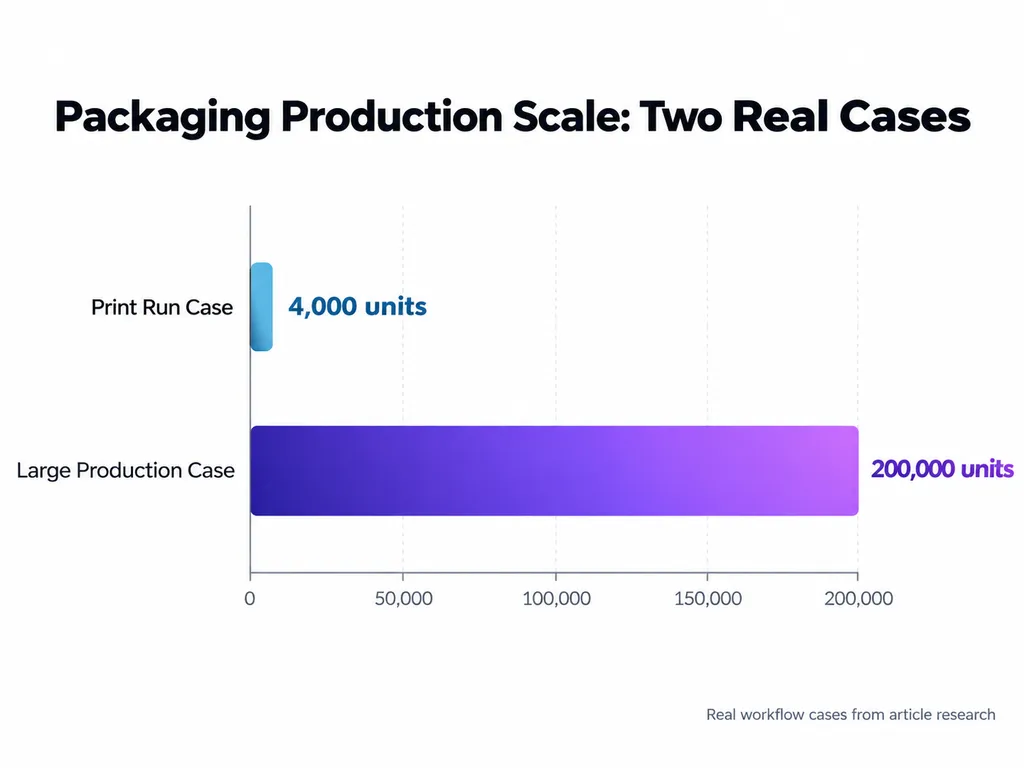
One print case in our research involved roughly 4,000 units. The artwork and proof were correct, but color shifted later during production because press conditions and ink balance changed.
This shows that file accuracy and production consistency are separate problems.
Who Is Responsible for Packaging Design, Dielines, and Print Production?
Packaging projects work better when responsibilities are explicit.
Responsibility | Designer | Printer / Converter | Manufacturer |
|---|---|---|---|
Brand hierarchy | Primary | Review | Input |
Visual artwork | Primary | Technical review | Input |
Dieline | Sometimes | Often | Often |
Dieline approval | Review | Primary | Primary |
Bleed setup | Primary | Verify | Specify |
Spot colors | Primary | Verify | Specify |
Structural safety | Input | Shared | Primary |
Proof review | Primary | Produce | Sometimes review |
Production tolerances | Understand | Define | Define |
The supplier usually defines technical tolerances. The designer applies them correctly. The printer verifies production compatibility.
Creative approval does not replace technical approval.
How to Reduce Packaging Risk Before a Large Print Run
Production risk grows quickly with volume.
One of the strongest cases in our research involved an initial run of approximately 200,000 packaging units for a confectionery product.
The main concern was simple: a problem that appears minor on screen can become expensive after mass production begins.
A safer workflow is:
- Complete the production artwork.
- Run printer preflight.
- Request a physical proof when possible.
- Review representative samples.
- Confirm color and finishing expectations.
- Conduct a press check for high-risk jobs.
- Approve the full run after validation.
For large orders, even a small number of physical samples can provide far more confidence than a digital mockup alone.
The cost of proofing usually grows slowly. The cost of discovering an error after production grows quickly.
What Packaging Design Software Should You Use?
Adobe Illustrator remains one of the most common tools for dielines, vector artwork, typography, spot colors, and production files.
Photoshop is useful for raster imagery, retouching, textures, and compositing.
ArtiosCAD and Esko tools become more relevant for structural engineering, carton development, industrial prepress, and packaging automation.
Figma can support concepts, visual systems, and collaboration, but production workflows often require stronger support for spot colors, dielines, separations, and finishing layers.
The best tool is therefore not simply the one that creates the best-looking concept. It is the toolchain that can move the project reliably from concept to manufacturing.
How to Know When a Packaging Design Is Ready for Production
A package should pass three approval stages.
Creative approval
Confirm that:
- The brand is clear
- The product is easy to identify
- The hierarchy works
- The system scales across SKUs
Technical approval
Confirm that:
- The approved dieline is used
- Bleed and safe areas are correct
- Spot colors are correct
- Finishing layers are separated properly
- Barcodes and assets are production-ready
Production approval
Confirm that:
- Physical proofs have been reviewed
- Color is acceptable
- Registration and folds are acceptable
- Finishing works correctly
- Early production output matches expectations
A package is production-ready only when it passes creative, technical, and production approval.
FAQ
Do I need a dieline before designing packaging?
You can begin visual exploration without a final dieline, but production artwork should be built on a manufacturer-approved structure. Self-built dielines are useful for concepts and prototypes, while the printer or manufacturer should confirm the final production version.
How much bleed should packaging have?
There is no universal value. Bleed depends on the printer, material, package structure, and production process. Background artwork normally extends into the bleed, while important text, logos, and barcodes remain inside the safe area. Always use the printer's specification.
Should packaging be designed in AI, PSD, or PDF?
AI is commonly used for vector production artwork and dielines, while PSD is useful for raster imagery. PDF is often used for final delivery. The correct format depends on the printer's workflow, so confirm color, fonts, spot colors, finishing layers, and export settings before delivery.
Do I need a physical proof before mass production?
Yes, whenever production volume, color sensitivity, structure, or finishing creates meaningful risk. A 3D mockup shows appearance, but a physical proof helps validate scale, folding, substrate, and print behavior. This becomes especially important for large runs such as the approximately 200,000-unit case identified in our research.
Conclusion
Learning how to design packaging means learning how to connect visual creativity with physical production. The strongest workflow begins with real product requirements and a verified dieline, develops a scalable visual system around the package structure, uses AI where it improves exploration and repetitive execution, validates the result with full-size prototypes, and treats prepress, proofs, and supplier communication as part of the design process itself. The cases in our research—from designers producing two to three SKUs per week, to dielines reconstructed in about one hour, to experienced specialists still building physical prototypes after two decades, to runs of 4,000 and approximately 200,000 units—lead to the same principle: the best packaging is not simply attractive; it is a design system that survives folding, printing, scaling, and real-world production.
Más del blog de Virse
Flujo de trabajo
How to Master Grid-Based Design: Choose the Right Grid, Use It Well, and Know When to Break It
7 de octubre de 2026 by Yifan Zhao
Flujo de trabajo
How to Choose Design Layouts When You Don’t Know Where to Start
7 de octubre de 2026 by Yifan Zhao
Flujo de trabajo
What Are the 7 Elements of Design? Examples and How to Use Them
7 de octubre de 2026 by Yifan Zhao