How to Use Kling 4.0 Keyframes for Smoother Videos
 Yifan Zhao13 分钟阅读 ·

Kling 4.0 Keyframes work best when you use a few consistent reference images in an AI video workflow to control character identity, scene position, camera direction, and major action states. They can make transitions smoother, but adding more keyframes does not automatically improve results. Large visual gaps, competing actions, and fast hand movements can still cause face drift, object deformation, sudden jumps, or footage that looks like a moving photograph.
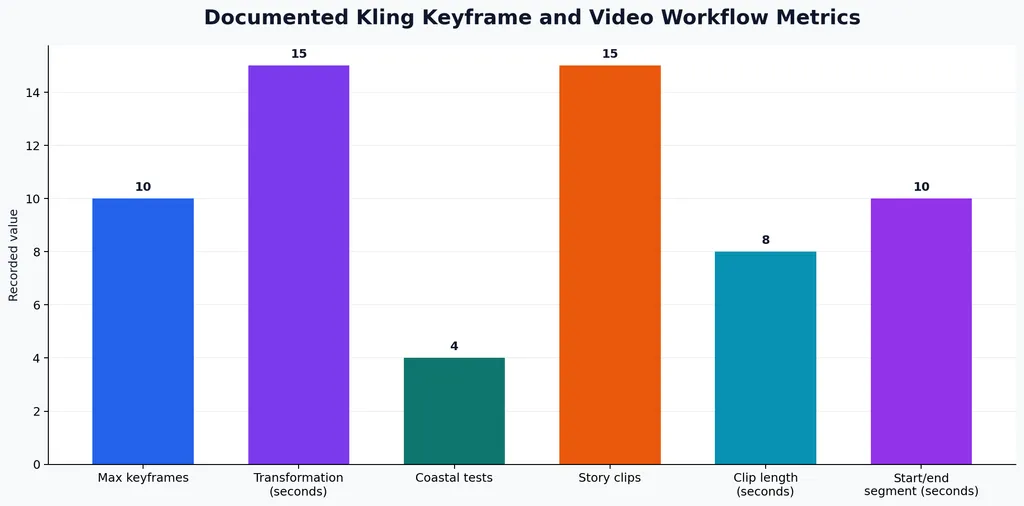
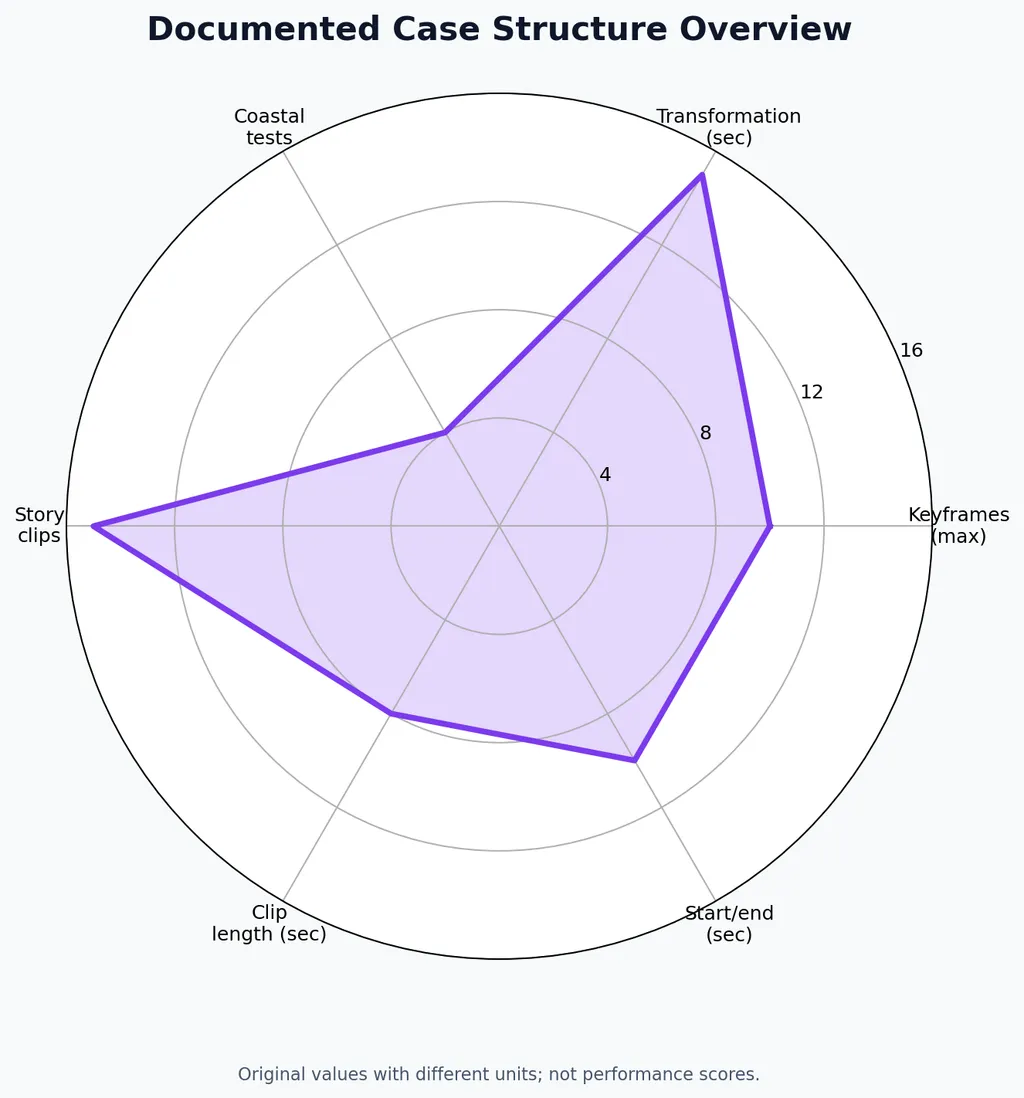
That is why many creators struggle with Kling 4.0: a single failed generation can force several retries, while a complex prompt may still ignore part of the requested action. Our review of documented Kling workflows indicates that the most reliable approach is to lock only the important visual states, test short clips, and split complex stories into manageable shots. The case studies in this article show how creators used 15-second transformations, four environmental tests, 15 eight-second clips, and 10-second start-to-end segments to build more controllable videos.
Virse gives you a broader production workflow when one model cannot deliver the shot you need. Its paid plans provide unlimited access to multiple AI models and unlimited seats, so teams can compare Kling with other video tools without managing separate subscriptions for every experiment. New users also receive free credits to test the workflow before upgrading, making it easier to create reference images, compare generations, and keep the most usable result.
What Are Kling 4.0 Keyframes and Why Do They Matter?
Kling 4.0 Keyframes are reference images that define important visual states within a generated video. They give the model visual information about what the subject, environment, camera composition, or object should look like at different points in the sequence.
A text prompt describes the intended motion, while keyframes establish visual boundaries. This distinction matters because AI video models must infer many details that a written prompt does not specify, including the subject’s exact position, clothing, scale, lighting, and relationship to the background.
Keyframes are useful for:
- Maintaining the same character across several moments
- Preserving the layout of a room, street, or landscape
- Guiding a camera from a wide shot to a closer composition
- Showing a product or object changing through several stages
- Controlling weather, lighting, smoke, water, and other environmental effects
- Creating clips that can be joined more easily in an editor
They should be treated as visual anchors rather than a frame-by-frame animation system. The model still creates the intermediate movement.
What Problems Can Keyframes Solve?
The most common continuity problems involve faces, clothing, object position, and scene geography. A character may look like a different person in the next shot, a boat may change direction without explanation, or an object may move to the wrong side of the frame.
Using consistent reference images reduces ambiguity. It does not eliminate every artifact, but it gives the model a stronger basis for interpreting the requested transition.
How Many Kling 4.0 Keyframes Should You Use?
Kling 4.0 discussions describe support for up to 10 keyframe inputs, but using the maximum number is rarely the most reliable approach. Our review found a recurring pattern: a few distinct keyframes often produce more natural motion than a crowded sequence of closely controlled images.
Production goal | Practical keyframe plan | Main reason |
|---|---|---|
Simple movement | Start and end frames | Leaves room for natural interpolation |
Character entering a scene | Start, middle, and end | Controls spatial position |
Product transformation | One frame for each major state | Clarifies transformation stages |
Complex physical interaction | Several short clips | Prevents competing actions |
Loop or transition | Matching first and final compositions | Creates a cleaner edit point |
Add a keyframe only when the model must reach a specific visual state. Extra images can reduce the available movement space and make the result feel rigid.
Why Can Too Many Keyframes Make Results Worse?
Each reference image adds another constraint. When those constraints describe different poses, camera angles, lighting conditions, or object positions, the model has less freedom to create a continuous path between them.
This is particularly visible in complex transformations. A sequence with many highly specific states may produce pauses, unnatural acceleration, or incomplete transitions because the model is trying to satisfy every reference at once.
A better approach is to define the major states and let the model generate the smaller changes between them.
How Do You Keep Characters Consistent Across Keyframes?
Character consistency depends on more than using the same name in a prompt. The reference images should preserve the character’s face, hairstyle, clothing, body proportions, lighting, and approximate camera scale.
Before generating, compare every keyframe for:
- Face shape and hairstyle
- Clothing color and distinctive accessories
- Body proportions and apparent age
- Lighting direction and color temperature
- Camera distance and subject scale
- Position relative to the background
For a dialogue scene, keep the characters’ screen positions stable unless the camera movement is intentional. If one character starts on the left and appears on the right in the next keyframe, Kling may interpret the change as a new staging arrangement rather than a natural camera move.
What Prompt Structure Helps Preserve Identity?
Separate identity instructions from movement instructions. A useful structure is:
- Identify the subject
- State what remains unchanged
- Describe the action in order
- Define the camera movement
- Describe the final position
For example, a prompt can specify that the same woman in a blue jacket remains the central subject while she walks from a doorway toward the shoreline. The camera tracks backward at a steady pace, while the coastline remains fixed in the background.
This structure makes the visual priority clear and reduces competition between identity, action, and camera instructions.
How Do You Create Smoother Start and End Frame Transitions?
Start and end frames work best when they show the same subject and environment with a moderate change in pose, position, or state. Large differences force Kling to invent too many intermediate events.
The most common symptoms of a difficult transition are:
- Sudden jumps in body position
- Unnatural pauses before the final frame
- Object deformation
- Accelerated movement near the end
- Visible traces of the starting composition
- A camera angle that changes without a clear reason
To reduce these problems, change one major variable at a time. If the subject must move, transform, change weather, and switch camera angles, divide the sequence into smaller shots.
When Should You Add a Middle Keyframe?
Add a middle keyframe when the subject must pass through a meaningful physical state. For example, a hand opening a door may need a frame showing the hand approaching the handle, another showing contact, and a final frame showing the door open.
A middle frame is also useful when the subject travels a long distance, changes scale significantly, or moves from a wide composition into a close-up. It gives the model a spatial checkpoint without forcing every small movement.
How Do You Make Kling 4.0 Generate Real Motion Instead of Image Shake?
A video can appear to move while the subject remains essentially static. This usually happens when the prompt describes an image or mood without defining a clear action sequence.
A motion-focused prompt should explain:
- What moves first
- Which direction the movement takes
- How quickly it happens
- What the camera does
- How the environment reacts
- Where the subject finishes
For example, a coastal prompt might describe a boat moving from the distant right side toward the foreground, turning left, and following the shoreline. It can also specify that the camera stays at water level, tracks backward slowly, and shows waves reacting to the hull while the coastline remains fixed.
This gives Kling a sequence of observable events rather than a general instruction to animate the image.
How Should You Describe Camera Movement?
Camera instructions should be short and separate from the action description. Use one main camera behavior per shot:
- Locked camera
- Slow push-in
- Side tracking
- Pan from left to right
- Tilt upward
- Pullback from the subject
Combining a rapid zoom, a rotation, a subject transformation, and a complex physical action in one shot creates competing demands. If the camera movement is essential, simplify the subject action around it.
What Do Documented Kling 4.0 Keyframe Cases Show?
The available cases provide useful workflow evidence, but they do not establish a universal success rate or controlled benchmark. Their value comes from showing how creators use keyframes to structure visual continuity.
Case Study: A 15-Second Multi-Stage Product Transformation
One documented Kling 4.0 example began with a laptop on a white desk and moved through several visual states:
- A laptop
- A high-tech gaming device
- A server rack
- A miniature city
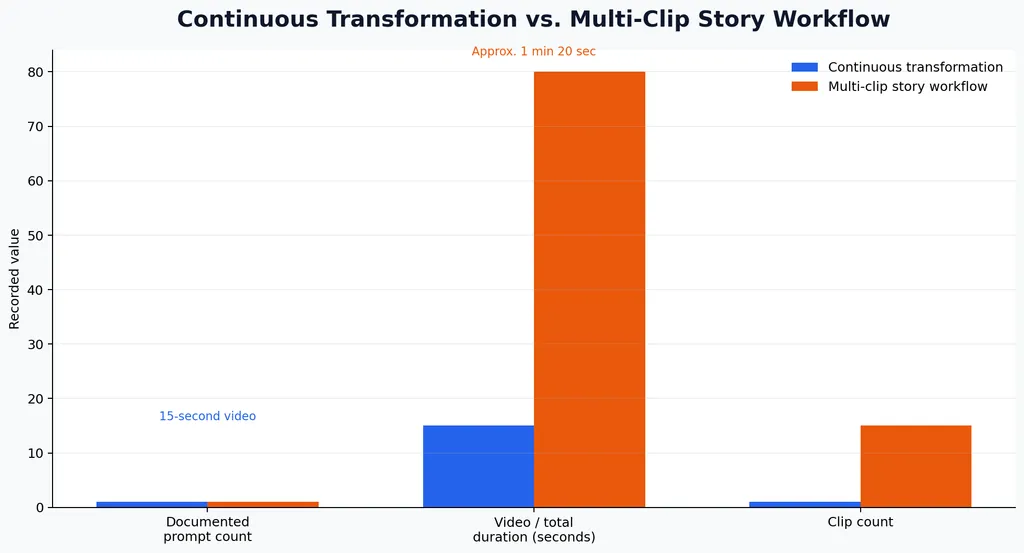
The documented example used one prompt to generate a 15-second video showing the stages as a continuous transformation. Previously, these stages would have required separate generations and editing.
The case demonstrates where keyframes are most useful: product evolution, concept visualization, spatial transformation, and visual transitions. It does not prove that every complex narrative can be generated successfully in one pass.
Case Study: Four Tests From the Same Coastal Image
A Kling 4.0 Flash test reused one coastal starting image for four different scenarios:
- A storm with a monster
- Two people entering the beach and having a conversation
- A boat approaching and moving along the coast
- An explosion involving debris, smoke, and water impact
The practical insight is that a stable environment image can support multiple narrative directions. The keyframe is doing more than adding movement to a still image; it helps preserve the identity of the location while the action and atmosphere change.
The results should be interpreted as workflow examples rather than systematic performance data. Each scenario places different demands on character motion, environmental effects, camera continuity, and physical interaction.
Case Study: Fifteen Eight-Second Clips for a Story Video
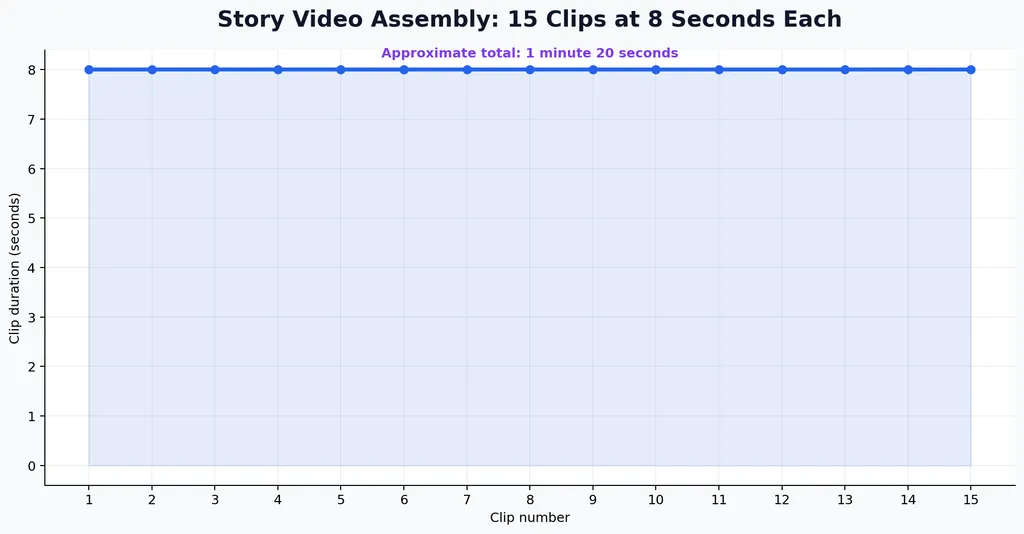
Another documented workflow used 15 clips of 8 seconds each, producing an approximately 1-minute-20-second video. The creator first developed consistent images with ChatGPT Images and Midjourney, refined them with Magnific AI, animated them with Veo 3.1 and Kling 2.6, and assembled the result in CapCut.
The video reportedly received 115,000 views within five days. The useful lesson is the production method rather than the view count: stable images were prepared before animation, and the story was divided into short clips instead of being generated as one long sequence.
This approach reduces the number of decisions each generation must make. It also makes it easier to replace one failed clip without rebuilding the entire story.
Case Study: Ten-Second Clips With Start and End Frames
One documented animation workflow used 10-second clips. The final frame of one segment became the starting frame for the next segment, creating a visual handoff between clips.
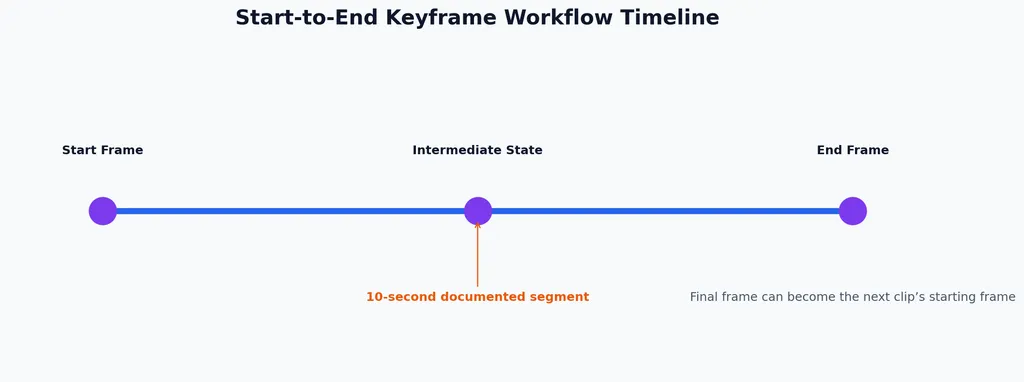
This method works well for small movements, loops, and gradual transitions. It becomes less reliable when the subject changes position dramatically or when the start and end compositions show substantially different actions.
When the visual change is large, adding an intermediate state or cutting to a new angle is usually more controllable than forcing a single continuous shot.
When Should You Use One Long Shot or Multiple Short Clips?
Use one continuous shot when the subject performs one connected action and the environment, camera, and composition remain relatively stable. Split the sequence when the story introduces a new camera angle, location, major effect, or unrelated action.
One continuous shot | Multiple shorter clips |
|---|---|
One connected action | Several unrelated actions |
Stable camera direction | Wide shot changes to close-up |
Similar start and end compositions | Large start/end differences |
Moderate movement | Fast hand or object interaction |
Gradual transformation | Major location or weather change |
For example, a character walking from a distant position to the shoreline may work as one shot if the camera movement is simple. Adding dialogue, a storm, an explosion, and a boat crossing the frame may require several clips.
How Do You Handle Hands, Keys, and Other Small Objects?
Small object interactions are among the most fragile parts of AI video generation. Fingers, door handles, keys, cables, and thin tools require exact contact between multiple moving elements.
Use a closer composition and define the interaction in stages:
- The hand approaches the object.
- The fingers make contact.
- The object moves.
- The hand and object separate or reach the final position.
Avoid combining this action with a major camera rotation or dramatic scene transformation. If the interaction is essential to the story, create a dedicated close-up rather than asking one wide shot to show every detail.
How Should You Estimate the Cost of Failed Generations?
The meaningful production metric is the cost of a usable shot, not the listed price of one generation. A cheap attempt can become expensive after repeated retries, manual selection, editing, and replacement footage.
Track:
- Number of generations
- Credits used per attempt
- Number of usable clips
- Time spent reviewing outputs
- Additional image, editing, or enhancement costs
Our review found no controlled evidence that establishes a reliable average failure rate or universal cost per successful Kling 4.0 shot. Mode availability, interface settings, resolution, duration, and retry behavior can all affect the final cost.
A Repeatable Kling 4.0 Keyframe Workflow
Use this process for character scenes, product transformations, and environmental transitions:
- Define one primary action.
- Create consistent start, middle, and end images.
- Check identity, lighting, camera scale, and spatial position.
- Write the movement in a clear order.
- Add one main camera instruction.
- Generate a short test before building a longer sequence.
- Remove keyframes that do not control an important state.
- Split complex actions into separate clips.
- Use the previous clip’s final frame as the next starting frame when continuity matters.
- Assemble and review the usable takes in an editor.
- Measure cost by usable footage rather than attempts alone.
Conclusion
Kling 4.0 Keyframes are most effective when they establish a few clear visual states and leave enough room for the model to create natural movement. They can improve character continuity, preserve scene geography, guide transformations, and connect short clips, but they cannot compensate for excessive action, large visual gaps, or conflicting instructions. The most dependable workflow is to keep identity and composition stable, describe motion in sequence, use middle states only when needed, and divide complex stories into short controllable shots.
FAQ
How many keyframes does Kling 4.0 support?
Current workflow discussions describe up to 10 keyframe inputs, although availability may depend on the interface or mode. Use the fewest frames needed to define the important visual states.
Are more keyframes better for smoother motion?
No. Too many keyframes can over-constrain the transition and produce stiff movement, pauses, or incomplete actions. Start with two or three clear states and add a middle frame only when the subject must pass through a critical position.
How do I stop character face and clothing drift?
Keep the face, hairstyle, clothing, lighting, camera scale, and screen position consistent across reference images. Use shorter clips for dialogue and physically detailed actions, and avoid changing identity and composition at the same time.
Should I use one long shot or several short clips?
Use one shot for a single connected action with stable framing. Use several clips when the sequence includes major camera changes, different locations, fast object interactions, or multiple unrelated actions.
Can keyframes prevent every generation failure?
No. Keyframes reduce ambiguity, but they do not guarantee accurate hands, facial motion, object contact, or smooth interpolation. Test short clips first and judge the result by usable footage rather than by the number of reference images.