How to Make Stickers: Design, Cut Lines, and Print
Vincent12 分钟阅读 ·
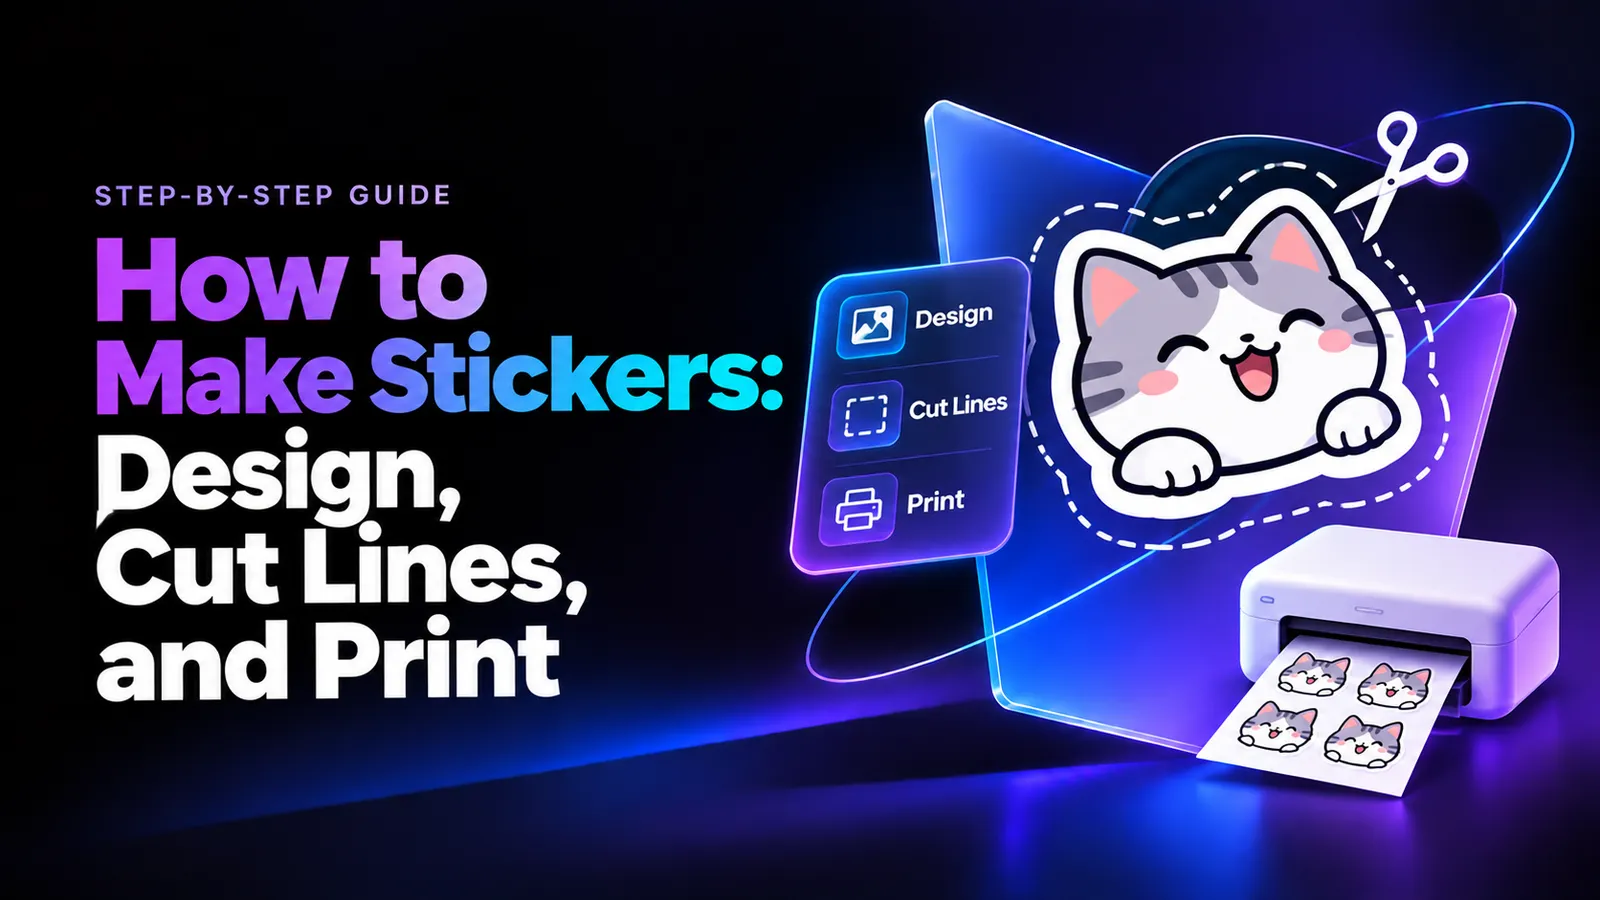
Making stickers at home is simple: create your artwork, add a cut line, print it on compatible sticker paper or vinyl, and cut it with scissors or a Cricut. For clean, professional-looking results, use high-resolution designs, accurate cutting paths, and the right print settings.
But a great graphic design doesn't guarantee a great sticker. Misaligned Cricut cuts, torn backing paper, faded colors, and incorrect cutting pressure can waste materials and hours of work. Our review of sticker-making questions found that these problems often come down to poor cut-line preparation, incompatible materials, and skipped test cuts.
Before printing, bring your sticker ideas to life with Virse. Its Infinite Canvas, AI design tools, , reusable creative assets, and Aesthetic Memory help you explore styles, refine characters, and create cohesive sticker collections in one workspace. Eligible paid plans offer unlimited usage of supported AI models and unlimited team seats, while new users receive free credits to start creating.
How to Make Stickers at Home: What Do You Need?
You can make homemade stickers with a printer, compatible sticker paper, and scissors. A Cricut or another cutting machine is optional, although automated cutting becomes useful for intricate designs and larger batches.
What Supplies Do You Need to Make Stickers?
Start with these essentials:
- Design software: Create illustrations, lettering, logos, or sticker sheets.
- Printer: Use an inkjet or laser printer compatible with your chosen material.
- Sticker paper: Choose matte, glossy, or printable vinyl.
- Cutting tool: Use scissors, a craft knife, or a compatible cutting machine.
- Cutting mat: Support the material during machine cutting or craft-knife work.
- Optional laminate: Add surface protection when your project requires it.
For beginners, a home printer, matte sticker paper, and sharp scissors are enough.
Our review of DIY sticker-making workflows found that specialized equipment isn't necessary for small personal projects. The biggest difficulties usually emerge when makers need accurate cuts, consistent quality, or higher production volumes.
Start with a small test sheet before investing in additional equipment.
Which Sticker Paper Is Best?
The best sticker material depends on its intended use.
- Matte sticker paper: Suitable for journals, planners, and writable labels.
- Glossy sticker paper: Creates a shiny finish for colorful illustrations.
- Printable vinyl: Useful for custom decals and stickers exposed to frequent handling.
- Clear printable film: Works for transparent-style labels and decorations.
- Laminated printable vinyl: Adds a protective layer for suitable applications.
For example, planner stickers rarely need the same materials as vehicle decals.
One important finding from our research is that printable vinyl, waterproof stickers, and weatherproof stickers are not interchangeable. Material durability also depends on the ink, adhesive, coating, and environment.
Always confirm whether your material supports inkjet or laser printing. Using incompatible materials can damage the print or printer.
How to Design Custom Stickers for Printing
A successful sticker design needs a recognizable silhouette, readable details, and enough space for accurate cutting.
Complex illustrations can look impressive on screen but become difficult to cut or peel when printed at small sizes.
Step 1: Create Your Sticker Artwork
Start with a clear concept, such as an animal character, decorative icon, floral illustration, or short phrase.
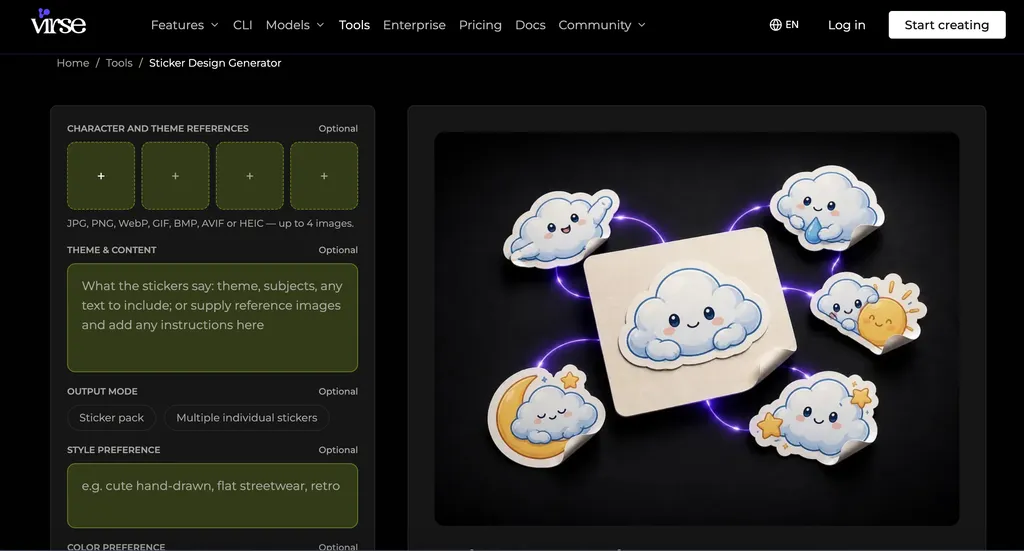
For AI-assisted sticker design, Virse's sticker design generator helps you explore different visual styles, develop characters, and refine artwork within a shared creative canvas.
If you want to explore more approaches to AI-assisted visual creation, see this guide to using AI for graphic design.
Consider a collection of six cat stickers. Instead of creating six unrelated images, establish consistent characteristics:
- Rounded character proportions
- Matching facial features
- Pastel colors
- Similar line thickness
- Consistent illustration style
You can explore variations in Virse, then prepare the selected artwork in software supporting precise print dimensions and cutting paths.
The key is visual consistency. A coordinated sticker collection often feels more polished than individual illustrations with unrelated styles.
Step 2: Set the Right Sticker Size and Resolution
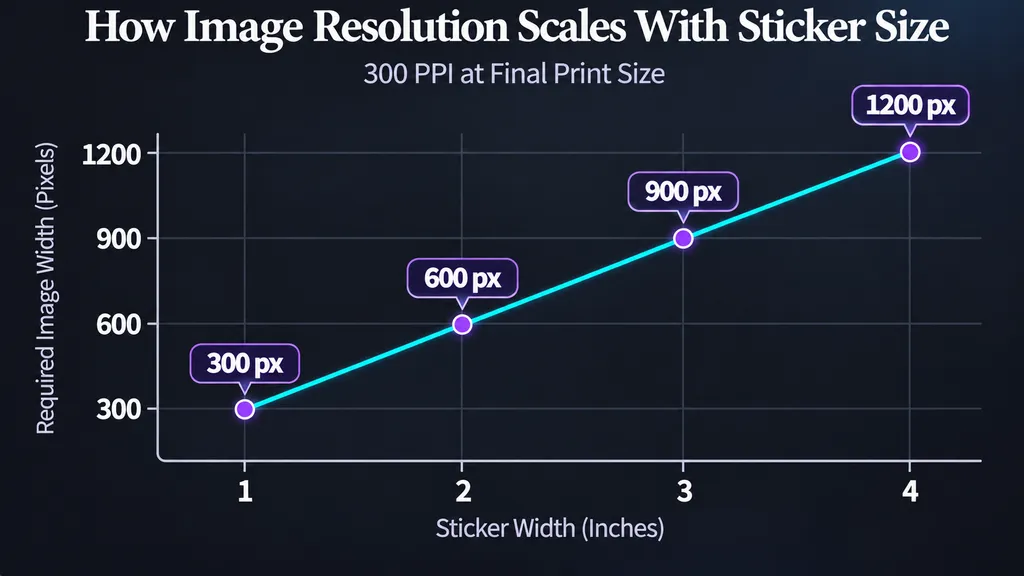
For raster artwork, 300 pixels per inch (PPI) at the intended print size is a useful preparation target.
For example:
- 1-inch sticker: 300 × 300 pixels
- 2-inch sticker: 600 × 600 pixels
- 3-inch sticker: 900 × 900 pixels
- 4-inch sticker: 1200 × 1200 pixels
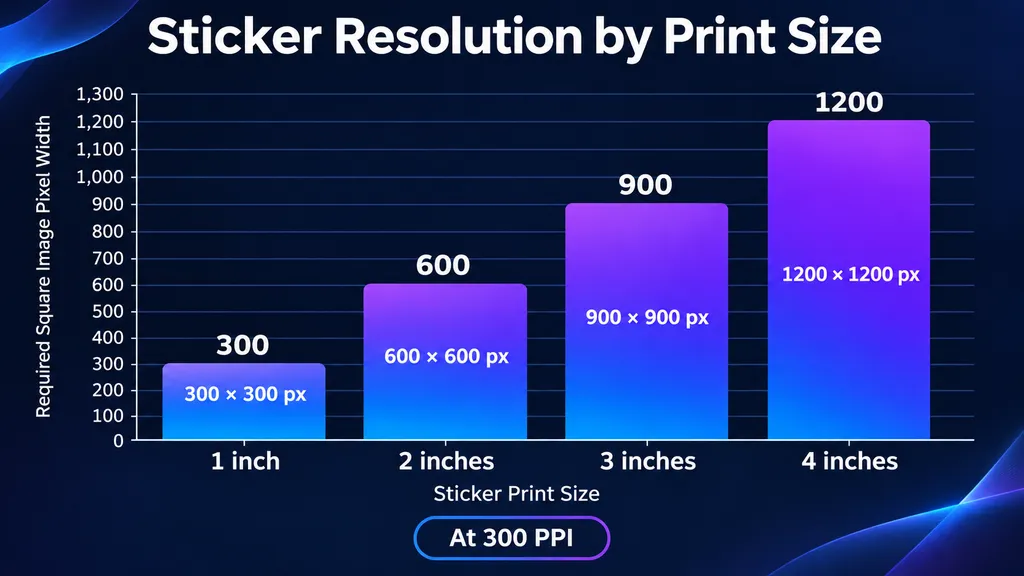
A 600 × 600-pixel illustration contains enough pixels for a 2-inch sticker at 300 PPI.
However, enlarging a blurry image won't restore missing details.
PNG is useful for raster artwork with transparent backgrounds, while SVG is suitable for scalable vector designs when supported by your software.
Practical tip: Preview your design at its actual printed size. Thin text, narrow lines, and small facial features may disappear when reduced.
Step 3: Add a White Border Around Your Sticker
A white border separates the artwork from surrounding surfaces and creates some tolerance for minor cutting inaccuracies.
In sticker-design software, this border is commonly called an offset.
To create one:
- Select your artwork.
- Apply an Offset or Outline effect.
- Create a slightly larger shape behind the design.
- Set the new shape to white.
- Inspect sharp corners and narrow gaps.
- Confirm the intended outer cutting path.
Avoid complicated outlines around individual strands of hair, leaves, or tiny decorative elements.
A smoother outline is generally easier to cut and less likely to tear during peeling.
How to Make Cut Lines for Stickers
A sticker cut line is the path followed by a cutting machine to separate your artwork from the surrounding material.
Our review of user questions identified cutting depth and backing-paper damage as recurring problems, particularly when switching between individual stickers and sticker sheets.
Kiss-Cut vs. Die-Cut Stickers: What's the Difference?
Kiss-cut stickers are cut through the printable adhesive layer while keeping the backing intact.
They're ideal for planner stickers, labels, and sheets containing multiple designs.
Die-cut stickers are cut through both the sticker material and backing, creating separate pieces shaped around the artwork.
They're useful for merchandise, giveaways, and individual decorative stickers.
The essential difference is cutting depth.
A kiss-cut that leaves the backing intact has worked correctly. Increasing pressure unnecessarily can slice through the liner and ruin the intended sticker sheet.
How to Create Sticker Cut Lines in Cricut Design Space
For a traditional Cricut Print Then Cut project:
- Upload your sticker artwork.
- Adjust its finished dimensions.
- Add an offset if needed.
- Arrange the artwork and border.
- Flatten the appropriate printable layers.
- Confirm the intended outer cutting shape.
- Select Print Then Cut.
- Review the cutting preview.
Flatten is particularly important for multilayer artwork. Incorrect layer preparation may cause the machine to cut around individual letters, eyes, or decorative elements instead of the complete sticker.
Compatible Cricut machines also offer sticker features that simplify border creation and kiss-cut or die-cut selection.
How to Choose the Correct Cutting Pressure
Cutting pressure depends on the material's thickness, blade condition, and machine settings.
For example, laminated printable vinyl may require different settings from ordinary sticker paper.
Before cutting a complete sheet:
- Select a compatible material setting.
- Cut one small test design.
- Check whether the sticker separates cleanly.
- Inspect the backing paper.
- Adjust the setting if necessary.
Our research identified repeated cases of makers trying multiple pressure settings without isolating the material issue.
Test the complete material combination, including laminate, before producing a full batch. Changing materials can change the required cutting depth.
How to Print and Cut Stickers Without Mistakes
Printing and cutting are separate operations, even when using Cricut Print Then Cut.
Understanding which stage failed helps prevent wasted sticker paper and unnecessary troubleshooting.
Step 1: Print Stickers With the Correct Settings
Before printing:
- Confirm printer and sticker-paper compatibility.
- Select the appropriate media type.
- Choose a suitable high-quality print setting.
- Check the artwork's physical dimensions.
- Avoid unintended scaling.
- Print a test copy on ordinary paper.
For cutting-machine projects, preserve the registration markings generated by the software. These markings help the machine locate your printed artwork.
Also distinguish between white borders and bleed.
A white border remains visible on the finished sticker. Bleed extends printed color beyond the intended cut edge to reduce unwanted white gaps.
Step 2: Cut Stickers Without a Cricut
You don't need specialized equipment to make attractive stickers.
After printing and allowing the ink to dry according to the material instructions:
- Cut the sheet into manageable sections.
- Use sharp scissors for curved outlines.
- Rotate the paper while cutting.
- Leave a consistent white border.
- Inspect the edges before peeling.
For rectangular labels, a paper trimmer can save time.
For intricate outlines, a craft knife and cutting mat provide additional control.
Manual cutting is practical for small batches, where machine setup time may exceed the time saved by automation.
Step 3: Fix Cricut Print Then Cut Alignment
Misaligned cuts are among the strongest pain points identified in our sticker-making research.
Several documented cases describe repeated calibration attempts that still produced shifted outlines.
These experiences highlight why changing cutting pressure alone won't solve every problem.
Use this troubleshooting sequence:
- Cut shifts left or right: Check printing scale, mat placement, and calibration.
- Machine cuts internal details: Review Flatten and cut-path settings.
- Backing paper tears: Check whether the cutting depth is too high.
- Stickers remain attached: Test the appropriate material setting.
- Registration marks aren't detected: Check material reflectivity and sensor compatibility.
Cricut's official guidance acknowledges that significant alignment offsets can require multiple calibration passes.
Certain reflective materials, including some glossy and metallic finishes, can also interfere with registration sensors.
The most reliable approach is to troubleshoot printing dimensions, sensor registration, and cutting pressure separately.
Changing all three simultaneously makes it harder to identify the actual problem.
How to Make Waterproof Stickers That Last Longer
Waterproof and weatherproof stickers have different performance requirements.
A sticker might tolerate occasional splashes but fade quickly under direct sunlight.
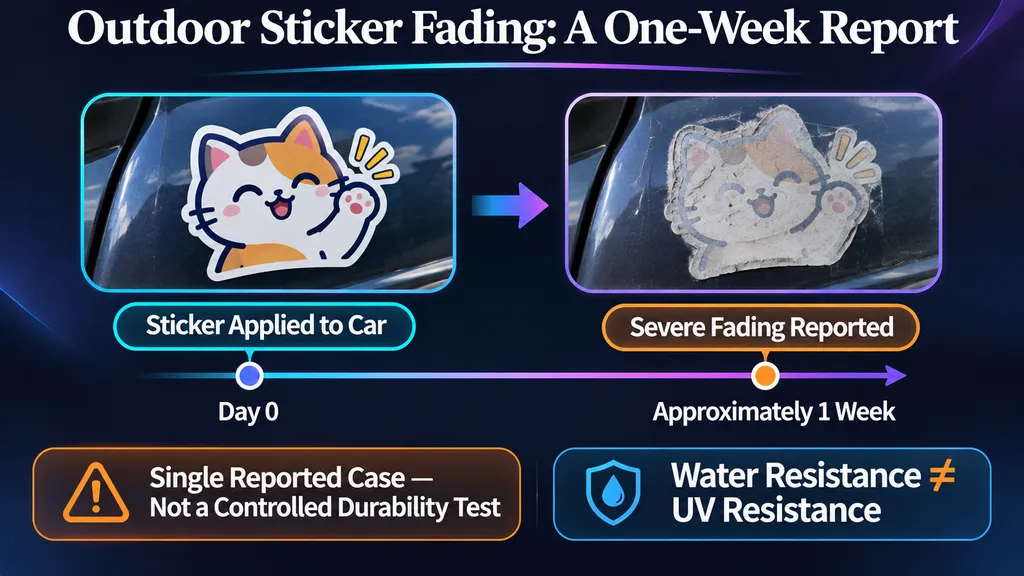
Our review identified an outdoor-use case in which a car sticker reportedly experienced severe fading after approximately one week.
This individual case isn't a controlled durability test, but it demonstrates why water resistance alone doesn't guarantee outdoor performance.
Waterproof vs. Weatherproof Stickers
Consider four different properties:
- Water resistance: Tolerance to limited moisture exposure.
- Waterproof performance: Resistance to water under specified conditions.
- UV resistance: Protection against sunlight-related fading.
- Weather resistance: Performance under combined outdoor environmental conditions.
A protective laminate may improve scratch resistance without providing sufficient UV protection.
Similarly, printable vinyl may resist moisture while its printed colors remain vulnerable to sunlight.
The complete printing system determines durability, not the word "waterproof" in a product description.
How to Improve Homemade Sticker Durability
For longer-lasting stickers:
- Choose materials rated for the intended environment.
- Use compatible printer settings and ink.
- Follow the recommended drying instructions.
- Apply suitable protective laminate if necessary.
- Test adhesion and moisture resistance.
- Verify UV specifications for outdoor use.
For water bottle stickers, don't assume dishwasher safety simply because the material survives occasional washing.
For vehicle decals or long-term outdoor applications, professional printing with documented weather-resistant materials may provide more predictable results.
Is It Cheaper to Make Stickers at Home or Order Them?
DIY sticker making offers flexibility, but lower material costs don't always mean lower production costs.
Our research included a discussion involving approximately 150 outsourced stickers, alongside cases involving artists preparing inventory for markets and events.
These cases highlight a frequently overlooked production expense: labor.
When Does DIY Sticker Making Make Sense?
DIY production is suitable for:
- Personal projects
- Small sticker collections
- Testing new designs
- Frequent artwork revisions
- Low-volume custom orders
Consider producing ten stickers. Manual cutting may be manageable.
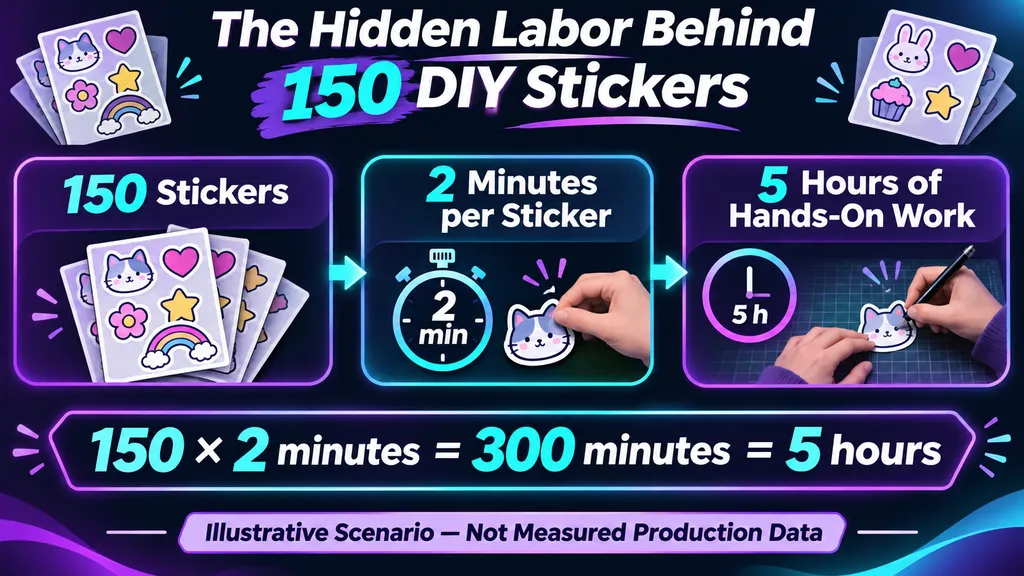
Now consider 150 stickers.
If cutting and finishing each sticker takes two minutes, the process requires five hours of labor, excluding design, printing, inspection, and packaging.
This is an illustrative workload calculation, not a measured production benchmark.
It demonstrates why handmade production becomes less attractive as quantities increase.
When Should You Outsource Sticker Printing?
Professional printing becomes worth considering when you need consistent large batches, specialized finishes, or less manual production work.
A useful cost calculation is:
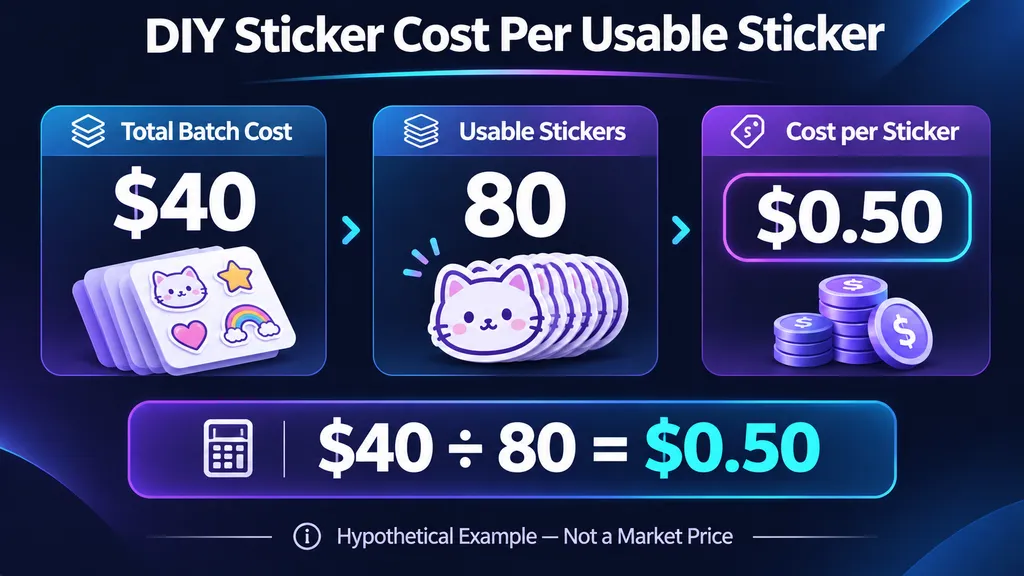
Cost per usable sticker = Total materials, ink, equipment allocation, labor, and waste ÷ Usable stickers
For example, if a batch costs $40 and produces 80 usable stickers, the effective cost is $0.50 each.
These figures are hypothetical, not current supplier prices.
Compare the result with professional printing quotes, shipping charges, minimum orders, and turnaround times.
The cheapest sticker isn't necessarily the one with the lowest material cost. Production time, waste, and consistency also matter.
FAQ
Can I make stickers with a regular printer?
Yes. A regular inkjet or laser printer can print stickers using compatible printable sticker paper or vinyl. Check the material instructions, print at the intended size, and cut the finished designs manually or with a compatible cutting machine.
How do I make stickers without a Cricut?
Create your design, arrange it on printable sticker paper, print it, and cut around the artwork using scissors or a craft knife. You can also use pre-cut adhesive label sheets to avoid cutting individual shapes.
Why does my Cricut cut stickers incorrectly?
Common causes include Print Then Cut calibration problems, incorrect printing scale, improperly configured cutting paths, excessive blade pressure, and registration sensor issues. Check the printed dimensions first, then troubleshoot calibration and cutting depth separately.
How do I make waterproof stickers at home?
Use compatible printable vinyl and consider adding protective laminate. Follow the material's drying and application instructions, then test the finished sticker. Remember that waterproof performance doesn't automatically mean UV-resistant, weatherproof, or dishwasher-safe.
Conclusion
Making stickers at home starts with a clear design, but consistent results depend on accurate cut lines, compatible materials, and properly configured printing and cutting settings. Begin with a small test sheet, choose kiss-cut or die-cut based on your intended product, and troubleshoot alignment separately from cutting pressure. Virse can help you develop creative sticker concepts and cohesive collections before preparing your artwork for printing. For larger batches or outdoor applications, compare DIY production with professional printing based on durability, labor, and total cost. The key to professional-looking homemade stickers isn't expensive equipment—it's a reliable workflow that produces clean, consistent results.