How to Design a Tattoo: 7 Steps to Create Your Own Design
 Yifan Zhao15 分钟阅读 ·
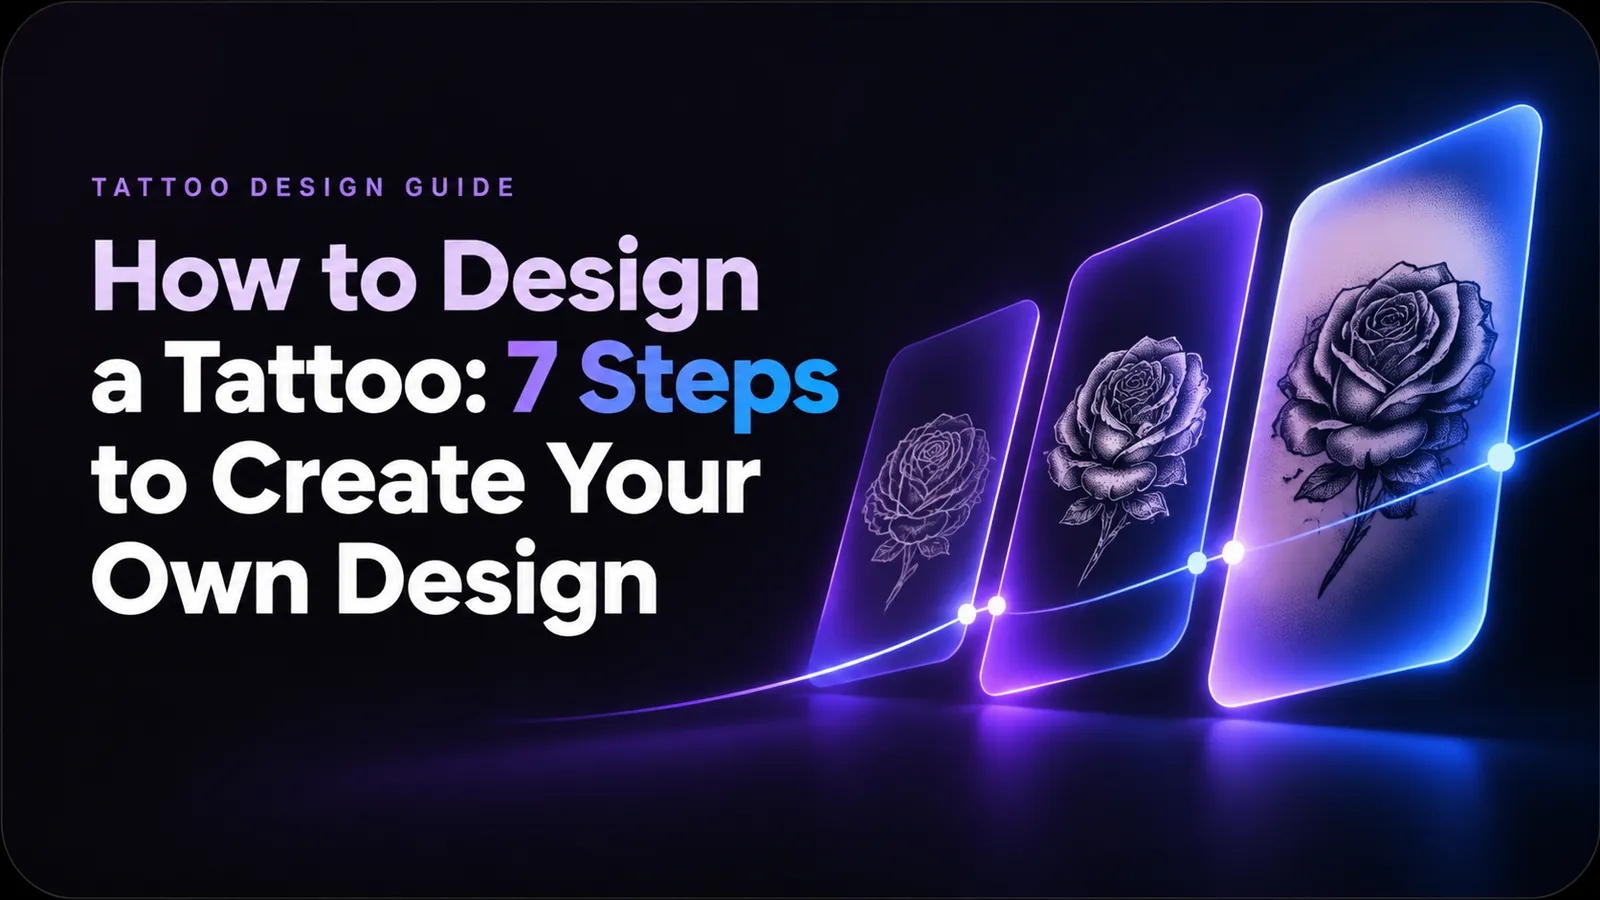
You can design your own tattoo without professional drawing skills. Start with a personal idea, collect visual references, choose a tattoo style, and arrange the elements into a clear composition. You can use paper sketches, digital design tools, or AI image generators to explore different concepts. Then, work with a professional tattoo artist to refine the design, adjust its size and placement, and make sure its details are suitable for tattooing.
The challenge isn't always drawing the tattoo. It's translating an idea in your head into a visual design that captures its meaning, looks balanced, and works on your body. A collection of unrelated Pinterest images or a detailed AI-generated illustration won't necessarily give a tattoo artist everything they need.
This guide explains how to design a tattoo step by step, even if you can't draw. You'll also learn how to use AI to explore original concepts, evaluate tattoo size and placement, and prepare a design brief that makes collaboration with an artist easier.
How to Design a Tattoo Step by Step
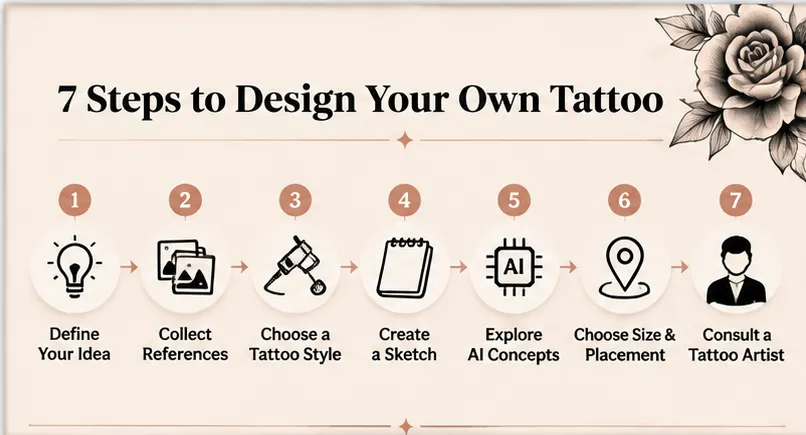
A good tattoo design starts with a clear concept, not a finished illustration. You need to define what the tattoo represents, establish its visual direction, organize its elements, and check whether the composition works for your intended placement.
Follow these seven steps.
Step 1: Start With a Personal Idea or Meaning
Before searching for tattoo pictures, decide what you want your tattoo to represent.
Your inspiration might come from:
- Personal experiences: A meaningful event, achievement, or life transition.
- People and relationships: Family members, partners, friends, or pets.
- Nature: Flowers, animals, mountains, oceans, or celestial objects.
- Symbols: Cultural symbols, meaningful objects, or abstract shapes.
- Interests: Music, literature, mythology, travel, or hobbies.
Write down the main idea in one sentence.
For example:
Personal Meaning | Possible Tattoo Concept |
|---|---|
Remembering a pet | Animal portrait combined with a birth flower |
Personal growth | Butterfly emerging from a botanical composition |
Family connection | Initials, birth flowers, or meaningful dates |
Overcoming difficulties | Phoenix, mountain, or rising sun |
Love of nature | Botanical illustration or wildlife composition |
Next, separate your idea into three categories:
- Must-have elements: Symbols, people, or details that carry personal meaning.
- Visual preferences: Colors, linework, composition, and overall style.
- Flexible elements: Decorative details, background shapes, and supporting objects.
This distinction becomes especially useful when you work with an artist or experiment with AI-generated concepts.
Step 2: Collect and Organize Tattoo Reference Images
Once you have a concept, collect visual references that help communicate what you want.
Pinterest, Instagram, tattoo artist portfolios, and design galleries are useful starting points.
Instead of saving every tattoo that looks attractive, organize your references by purpose.
For example, a custom pet tattoo might need:
Reference Category | What to Look For |
|---|---|
Main subject | Photos showing the pet's face and recognizable features |
Supporting elements | Flowers, leaves, or other meaningful objects |
Tattoo style | Fine-line, realism, blackwork, or illustrative references |
Composition | Examples showing how multiple elements fit together |
Linework and shading | The level of detail and contrast you prefer |
Create a reference board with separate sections for these elements.
A practical tip: Don't confuse inspiration with copying. You can borrow the visual direction of one reference, the composition of another, and the shading style of a third. The objective is to communicate your own concept rather than reproduce another artist's finished tattoo.
Avoid mixing too many unrelated styles. A clear visual direction gives your final design greater consistency.
Step 3: Choose a Tattoo Style
The same subject can look completely different depending on the tattoo style.
Here are some common styles to consider:
Tattoo Style | Visual Characteristics | Best For |
|---|---|---|
Traditional | Bold outlines, limited colors, recognizable shapes | Classic symbols and iconic imagery |
Fine Line | Delicate lines and minimal shading | Minimalist and botanical designs |
Realism | Detailed shading and lifelike proportions | Portraits, animals, and natural subjects |
Japanese | Flowing compositions and traditional motifs | Large-scale storytelling designs |
Geometric | Repeated shapes, symmetry, and structured lines | Abstract and symbolic tattoos |
Watercolor | Soft color transitions and painterly effects | Expressive, colorful artwork |
Blackwork | Solid black areas and strong contrast | Bold graphic designs |
Minimalist | Simple forms and limited visual elements | Small, understated tattoos |
You can combine visual influences, but choose one dominant style.
For example, a pet portrait might use realistic facial features with botanical elements in a fine-line style. This creates a more coherent visual direction than combining unrelated styles without a clear hierarchy.
Before moving on, write a short style description:
"Fine-line botanical tattoo with a realistic pet portrait, black ink, delicate shading, and a vertical composition."
This description can become the starting point for your sketch or AI design prompt.
Step 4: Turn Your Ideas Into a Tattoo Sketch
Now combine your references into an initial composition.
You don't need professional drawing skills. Your sketch only needs to communicate the relationship between the main subject and its supporting elements.
Start with three layers:
- Main subject: The central object or character that attracts attention.
- Supporting elements: Flowers, symbols, decorative shapes, or background details.
- Composition: How the elements connect and fit together.
For example, a custom pet tattoo might contain:
- A recognizable portrait of the pet as the focal point.
- A birth flower surrounding or framing the portrait.
- A small date or meaningful symbol.
- A vertical arrangement designed for the upper arm or forearm.
Try different arrangements before choosing one.
You can create your first concept using:
- Paper and pencil for simple sketches.
- A photo collage for combining reference elements.
- Digital drawing software for arranging and adjusting artwork.
- AI image generators for exploring alternative visual directions.
At this stage, focus on composition rather than tiny details.
A useful exercise is to create three versions of the same concept:
- Version A: Main subject only.
- Version B: Main subject with supporting elements.
- Version C: Main subject with decorative details and background.
Comparing these versions helps you decide whether additional elements improve the design or make it unnecessarily complicated.
Step 5: Use AI to Explore and Refine Tattoo Design Ideas
If you struggle to draw or visualize your idea, AI image generation can help turn a written description into visual concepts.
Instead of searching endlessly for an existing tattoo that matches your imagination, you can describe the subject, style, composition, and details you want.
AI is particularly useful during the early design process, when you're exploring possibilities rather than preparing a final tattoo stencil.
How to Create a Tattoo Design With AI
A practical AI-assisted workflow involves five stages.
1. Describe your original idea.
Start with the subject and personal meaning.
Example:
"I want a tattoo representing my relationship with my dog, combining a recognizable dog portrait with a birth flower."
2. Define the visual style.
Specify the artistic direction.
For example:
"Fine-line botanical illustration, black ink, delicate outlines, subtle shading, and a minimalist aesthetic."
3. Describe the composition.
Explain how the elements should be arranged.
For example:
"Place the dog portrait in the center, with a curved arrangement of flowers surrounding the lower half. Use a balanced vertical layout with sufficient negative space."
4. Generate and compare different concepts.
Explore several variations:
- A minimalist version with fewer decorative elements.
- A more detailed illustrative version.
- A symmetrical composition.
- An organic composition with flowing botanical elements.
Compare the overall structure rather than selecting an image simply because it looks more complicated.
5. Refine the preferred direction.
Once you find a promising concept, make targeted changes.
You might ask the AI to:
- Change the flower arrangement.
- Simplify the background.
- Remove unnecessary decorative elements.
- Adjust the composition from horizontal to vertical.
- Explore a different linework style.
- Preserve the main subject while changing supporting elements.
Platforms such as Virse can support this visual exploration process by helping you generate and refine different creative directions on a visual canvas. Rather than treating each generated image as an isolated result, you can compare concepts and develop a more coherent design direction.
Example: AI Tattoo Design Prompt
You can use the following prompt as a starting point:
"Create an original fine-line tattoo concept featuring a realistic dog portrait surrounded by delicate birth flowers. Use black ink, elegant outlines, subtle botanical details, balanced negative space, and a vertical composition. Keep the dog's facial features recognizable and the main subject visually dominant. Avoid excessive decorative elements, overlapping details, and unnecessary background textures. Present the artwork on a clean white background as a concept reference."
The prompt should be adjusted to reflect your actual subject, preferred style, and composition.
What AI Can and Cannot Do for Tattoo Design
AI Can Help With | Still Requires Professional Review |
|---|---|
Exploring different tattoo concepts | Checking whether the design is technically tattooable |
Combining visual references | Correcting anatomy and structural inconsistencies |
Experimenting with styles | Adjusting line thickness and spacing |
Comparing compositions | Evaluating the design at its actual physical size |
Visualizing alternative layouts | Preparing the final stencil |
Simplifying or changing visual elements | Assessing how the tattoo will work on the intended body area |
Important: An AI-generated tattoo image is a concept reference, not automatically a tattoo-ready design. Generated images may contain inconsistent anatomy, overlapping lines, unrealistic details, or small elements that are difficult to reproduce on skin.
Always have a professional tattoo artist review and adapt the design before using it as a final tattoo.
Step 6: Choose the Right Tattoo Size and Placement
A design that looks attractive on a computer screen may not work equally well on every part of your body.
The available space, body contours, movement, and level of detail all influence the final composition.
Consider these common placements:
Placement | Design Considerations | Common Design Directions |
|---|---|---|
Forearm | Long, curved compositions | Flowers, symbols, lettering |
Upper arm | Flexible space for larger compositions | Portraits, animals, traditional designs |
Wrist | Limited space and visibility | Simple symbols and small lettering |
Shoulder | Rounded surface and surrounding contours | Circular and flowing compositions |
Back | Large available design area | Detailed illustrations and large compositions |
Thigh | Broad surface for larger artwork | Botanical, realism, and decorative designs |
Ankle | Small, curved area | Minimalist symbols and compact designs |
How to Compare Different Tattoo Sizes
One of the most important decisions is how much space your design needs.
Consider a hypothetical design featuring a flower, a small animal portrait, and decorative details.
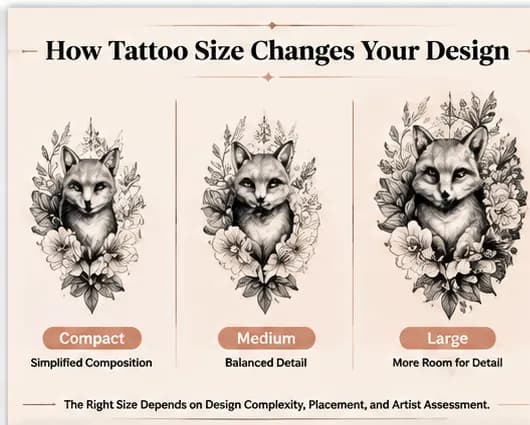
You could explore three versions:
Design Version | Composition | Main Trade-Off |
|---|---|---|
Compact | Main subject with simplified supporting elements | Less room for small details |
Medium | Main subject with more visible supporting elements | Balance between detail and available space |
Large | More room for shading, texture, and decorative elements | Requires more body space |
These are conceptual comparisons, not universal size recommendations. The appropriate dimensions depend on the artwork and your artist's assessment.
A useful approach is to preview the same design at different proportions and on the intended body area.
Ask your artist to evaluate:
- Whether the main subject remains recognizable.
- Whether individual lines have sufficient separation.
- Whether small lettering remains legible.
- Whether decorative elements compete with the focal point.
- Whether the design follows the body's natural contours.
Don't simply shrink a complex design to fit a smaller area. Simplifying the artwork may produce a more readable tattoo.
Step 7: Refine the Design With a Professional Tattoo Artist
Once you have a concept, references, and an approximate placement, arrange a consultation with a tattoo artist.
You don't need to arrive with a finished illustration. A clear concept and organized references can be more useful than an elaborate drawing that doesn't account for tattooing constraints.
Your artist may recommend changes to:
- Line thickness and spacing.
- The proportions of individual elements.
- Shading and contrast.
- Small or overlapping details.
- Overall composition.
- The design's relationship to your body's contours.
Be clear about which elements are essential and which can be modified.
Design Element | Your Preference |
|---|---|
Main subject | Must remain unchanged |
Flower selection | Open to suggestions |
Overall style | Fine line |
Placement | Inner forearm |
Approximate size | Prefer a compact design |
Small decorative details | Artist can simplify |
You should also explain why certain elements matter.
For example, if a particular flower represents a family member, explain that its identity is important even if the arrangement can change.
The best collaboration preserves your original intention while allowing the artist to improve the technical execution.
How to Design a Tattoo Without Drawing Skills
You don't need to be an illustrator to develop a custom tattoo concept. The key is to use tools that help you communicate visual ideas rather than trying to produce professional artwork yourself.
Here are four practical approaches:
Method | How It Works | Best For |
|---|---|---|
Reference collage | Combine images representing different design elements | Beginners with several visual ideas |
Paper sketch | Draw basic shapes and indicate where elements belong | Communicating a simple composition |
AI image generator | Turn written descriptions into visual concepts | Exploring different creative directions |
Digital drawing software | Arrange, resize, and edit visual elements | Users who want greater control over layouts |
For example, if you want a tattoo combining your pet and a birth flower:
- Collect a few clear photographs of your pet.
- Find flower references that match your preferred style.
- Create a collage showing how the elements might fit together.
- Use AI to explore alternative compositions.
- Select the concept that best represents your original idea.
- Take the references to a tattoo artist for professional refinement.
The important distinction is that you are designing the concept, not necessarily drawing the final tattoo artwork.
How to Make Sure Your Tattoo Design Ages Well
A tattoo is a long-term commitment, so visual clarity matters more than how detailed an image looks on a screen.
Some designs need adjustments before they are suitable for tattooing.
Consider these factors:
- Line spacing: Closely packed lines may become harder to distinguish over time.
- Small lettering: Tiny text can lose legibility as ink spreads.
- Fine details: Intricate elements may require more space to remain recognizable.
- Contrast: Clear differences between dark and light areas help preserve visual separation.
- Design complexity: Removing unnecessary details can make the main subject easier to recognize.
Fine-line tattoos are not automatically unsuitable for long-term wear. Their longevity depends on factors such as execution, placement, skin characteristics, aftercare, and the specific design.
Ask your artist which elements need simplification or additional space.
A useful rule is to evaluate your tattoo at its intended physical size, not just at full resolution on a computer screen.
What Should You Bring to a Tattoo Consultation?
A well-prepared consultation helps reduce misunderstandings and makes the design process easier.
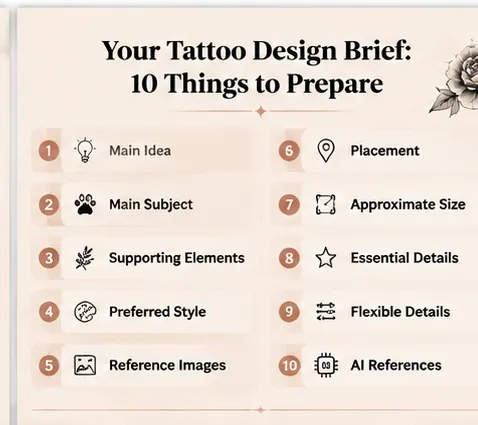
You can prepare a simple tattoo design brief containing the following information.
Tattoo Design Brief Template
Category | Questions to Answer | Example |
|---|---|---|
Main idea | What does the tattoo represent? | Remembering my dog |
Main subject | What should appear in the design? | Dog portrait |
Supporting elements | What other objects or symbols should appear? | Birth flower |
Preferred style | What visual style do you like? | Fine line |
Reference images | Which examples communicate your preferences? | Three botanical tattoo references |
Placement | Where do you want the tattoo? | Inner forearm |
Approximate size | How much space would you prefer? | Compact composition |
Essential details | What must remain unchanged? | Dog's recognizable facial features |
Flexible details | What can the artist change? | Flower arrangement and decorative elements |
AI references | Have you used AI-generated concepts? | Yes, clearly labeled as visual references |
You can copy this brief and complete it before your consultation.
You should also bring:
- Clear reference images.
- Photographs of your intended subject, if applicable.
- Your preferred design variations.
- Any AI-generated images, clearly identified as AI references.
- Questions about size, placement, and technical limitations.
Should You Let Your Tattoo Artist Change Your Design?
Yes, when the proposed changes improve the tattoo's practical execution without compromising its meaning.
A tattoo artist may recommend changing proportions, removing unnecessary details, adjusting line spacing, or increasing the overall size.
However, you should feel comfortable discussing significant changes before approving the final design.
A useful distinction is:
- Personal meaning: Explain which elements must stay.
- Visual preferences: Communicate your preferred style and composition.
- Technical decisions: Give the artist room to recommend professional adjustments.
This approach helps protect your creative vision while making the final tattoo more suitable for your body.
Conclusion
Designing your own tattoo doesn't require professional drawing skills. Start with a meaningful idea, collect references, explore different styles, and develop a simple visual concept. AI design tools can help you visualize and refine creative directions, while a professional tattoo artist ensures the final artwork is suitable for tattooing.
The most important part is not creating the most complicated image. It's turning your personal idea into a clear, distinctive design that fits your body and can be executed as a lasting piece of artwork.
Frequently Asked Questions
1. Can I design my own tattoo if I can't draw?
Yes. You can design a tattoo without drawing by collecting reference images, creating a visual collage, writing a design brief, or using an AI image generator. These methods help communicate your ideas to a tattoo artist, who can turn your concept into a technically suitable design.
2. Will a tattoo artist design a tattoo based on my ideas?
Many tattoo artists offer custom design services. You can explain your concept, provide reference images, and discuss your preferred style and placement. The artist can develop or adapt the artwork based on your requirements and their professional judgment.
3. Can I bring a picture of a tattoo I like?
Yes. Reference pictures are useful for communicating your preferred style, composition, shading, and visual elements. However, using an existing tattoo as inspiration is different from asking an artist to reproduce another person's original work exactly. Explain which aspects you like and ask for a design that reflects your own concept.
4. Can I use AI to create my tattoo design?
Yes. AI image generators can help visualize ideas, experiment with different tattoo styles, and create reference images. However, generated artwork may contain unrealistic details or linework that is unsuitable for tattooing. Have a professional tattoo artist review and adapt the image before using it as a final design.
5. How do I know if my tattoo design is too detailed?
A design may be too detailed if its lines, lettering, or decorative elements are difficult to distinguish at the intended tattoo size. Ask your artist to evaluate the design at its actual dimensions. They may recommend simplifying certain elements, increasing spacing, or choosing a larger placement.
How do I choose the best placement for my tattoo?
Consider the available space, body contours, visibility, movement, and how the design will fit the area. Long compositions may work well on the forearm, while larger illustrations may benefit from the upper arm, thigh, or back. Your tattoo artist can help assess the best placement for your specific design.
Should I give my tattoo artist creative freedom?
Give your artist flexibility in areas where their expertise can improve the result, such as linework, shading, proportions, and technical details. However, clearly communicate the elements that carry personal meaning or must remain unchanged. Agree on significant revisions before approving the final design.
Can I use Pinterest or AI images as my final tattoo design?
Pinterest and AI-generated images can provide useful visual references, but they should not automatically be treated as finished tattoo artwork. Existing images may belong to other artists, while AI images can contain technical inconsistencies. Use them to communicate your creative direction and work with a tattoo artist to develop an original, suitable design.