Glitch Art: History, Styles, and How to Make It
 Yifan Zhao18 menit baca ·
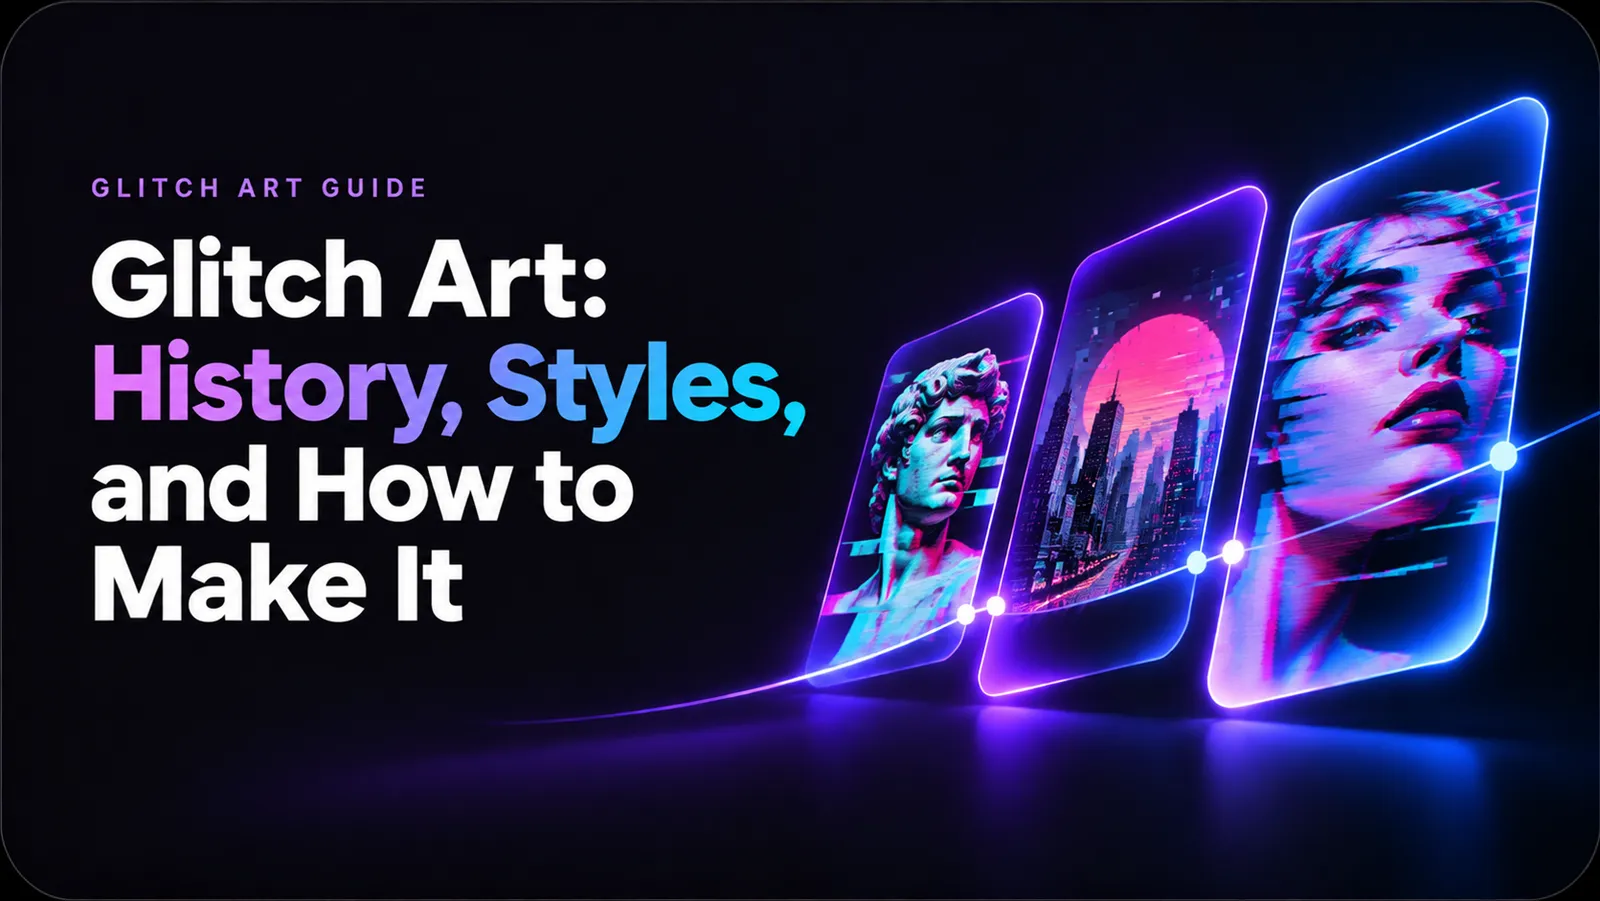
Glitch art transforms digital errors into striking visual designs through techniques like RGB splitting, pixel displacement, datamoshing, and digital noise. But creating a polished glitch artwork takes more than adding distortion effects—you need the right visual direction, consistent colors, and control over how different elements interact.
For many creators, the hardest part is turning an interesting idea into a finished composition. Switching between image generators and design tools, editing tools, and reference materials can slow down experimentation, while repeatedly recreating images makes it harder to maintain a consistent style. The challenge isn't just making an image look distorted; it's developing a distinctive visual style without losing control of the design.
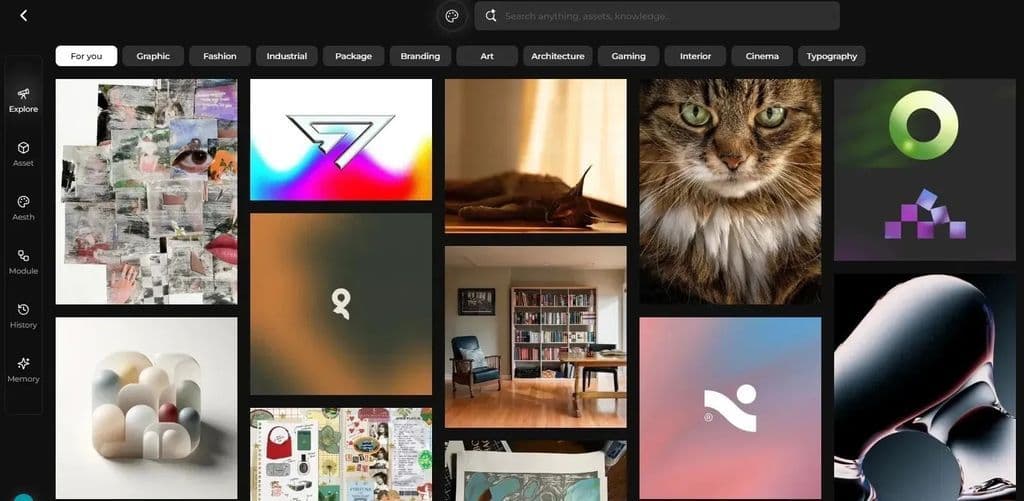
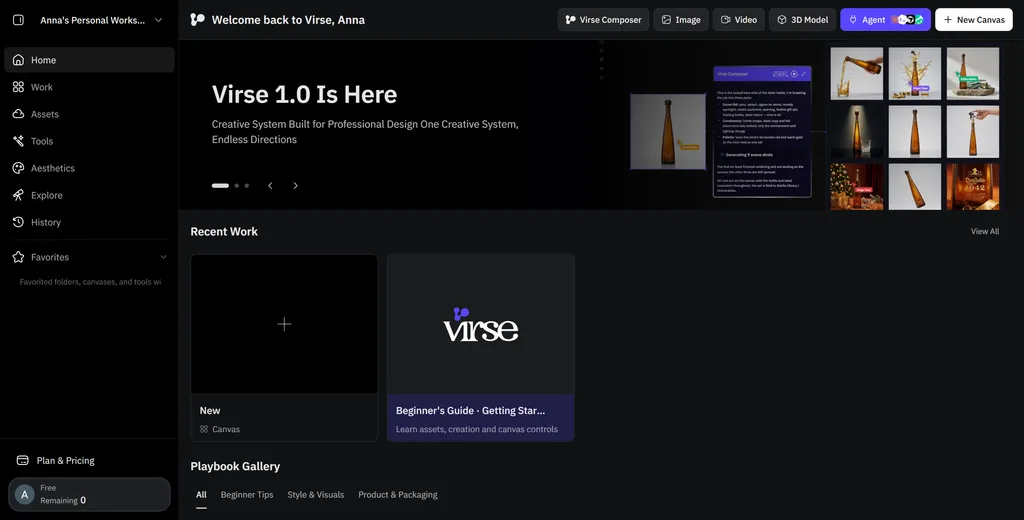
Virse makes that creative process easier with an infinite canvas, multiple AI models, and a collaborative visual workflow. Explore different glitch aesthetics, organize visual references, and refine your favorite concepts without being limited to a single model. You can start for free with registration credits, while paid plans offer unlimited use of a wide range of AI models and unlimited seats for collaborative creative work. Whether you're experimenting with your first glitch portrait or developing a complete cyberpunk visual campaign, Virse gives you more room to explore and create.
What Is Glitch Art?
Glitch art is a visual art style that uses digital errors, data corruption, and intentional image distortion as creative elements.
Instead of correcting technical imperfections, glitch artists emphasize them. Common characteristics include:
- RGB color separation: Red, green, and blue channels appear slightly misaligned.
- Pixel displacement: Horizontal or vertical sections of an image shift unexpectedly.
- Digital noise: Random visual interference creates a corrupted appearance.
- Compression artifacts: Blocky patterns and fragmented details resemble damaged digital files.
- Scan lines: Repeated horizontal lines create an electronic display effect.
- Image fragmentation: Parts of an image appear duplicated, stretched, or disconnected.
Glitch art is not simply adding a distortion filter to a photograph. Its defining characteristic is the deliberate use of visual breakdown to change how an image communicates.
A useful distinction is that a glitch effect imitates the appearance of a technical error, while an actual glitch may originate from an unexpected failure in a digital system. Both can become artistic material.
The History of Glitch Art: From Technical Errors to Digital Creativity
Glitch art developed alongside experimental electronic media, digital technologies, and artistic investigations into technological failure.
Its history connects experimental sound, video manipulation, computer-generated imagery, and internet culture.
Early Experimental Roots
Before glitch art became a recognizable digital art genre, artists and musicians were already exploring noise, distortion, and unexpected results produced by electronic equipment.
Experimental music helped establish the idea that technical imperfections could have artistic value.
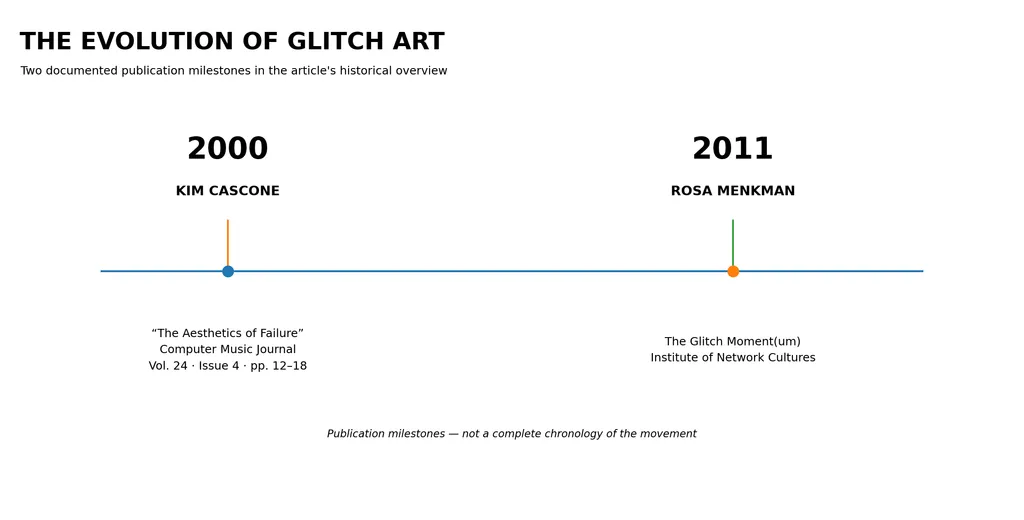
A particularly influential reference is Kim Cascone's 2000 essay, The Aesthetics of Failure: "Post-Digital" Tendencies in Contemporary Computer Music, published in Computer Music Journal, Volume 24, Issue 4, pages 12–18.
Although Cascone's essay focuses on experimental computer music rather than visual glitch art, it provides important context for understanding how digital errors, noise, and technological failures became creative materials.
The Emergence of Digital Glitch Art
During the early 2000s, artists increasingly experimented with corrupted digital files, unconventional software workflows, and manipulated image data.
The development of online art communities also made it easier to share experimental techniques and visual discoveries.
Rosa Menkman became an important figure in the theoretical development of glitch art. Her work investigates how digital systems process information and how technical breakdowns can expose the structures normally hidden behind digital images.
In 2011, she published The Glitch Moment(um) through the Institute of Network Cultures. The publication explores glitch as an artistic practice and examines its technical, cultural, and aesthetic dimensions.
Glitch Art in Contemporary Design
Today, glitch aesthetics appear across multiple creative fields:
- Music album covers and promotional artwork.
- Experimental photography and digital portraits.
- Fashion campaigns and editorial graphics.
- Video titles and motion graphics.
- Gaming visuals and futuristic interfaces.
- Social media artwork and digital posters.
Glitch art has also evolved beyond genuine file corruption. Designers can now recreate its visual language using conventional editing software, procedural techniques, and generative AI.
The important shift is from treating glitches only as technical accidents to using distortion as an intentional design decision.
7 Popular Glitch Art Styles You Should Know
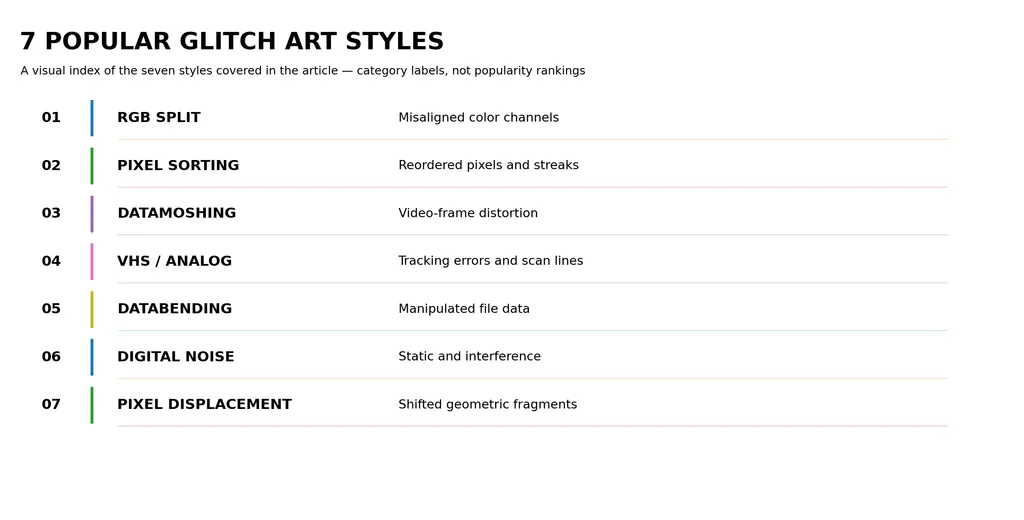
Glitch art is not one fixed visual style. Different techniques produce different types of distortion, ranging from subtle photographic imperfections to highly fragmented digital compositions.
1. RGB Split and Chromatic Aberration
RGB splitting separates the red, green, and blue color channels and shifts them slightly out of alignment.
This produces colorful outlines around objects, creating the impression of visual interference or misaligned electronic signals.
Best for: Portrait photography, futuristic posters, music artwork, and experimental typography.
How to use it: Keep the original subject recognizable and apply stronger channel separation around selected edges rather than distorting the entire image.
2. Pixel Sorting
Pixel sorting rearranges pixels according to specific characteristics, such as brightness, color, or threshold values.
Instead of randomly damaging an image, this technique creates organized streaks and flowing visual patterns.
Best for: Abstract digital compositions, experimental portraits, surreal landscapes, and contemporary editorial artwork.
How to use it: Combine relatively untouched areas with selected pixel-sorted sections to create visual contrast.
3. Datamoshing
Datamoshing manipulates compressed video data to create unusual motion artifacts.
Instead of displaying clean transitions between video frames, the resulting footage may contain stretched shapes, blended objects, and unexpected color movements.
Best for: Music videos, motion graphics, experimental filmmaking, and digital advertising.
How to use it: Use datamoshing when movement is part of the creative concept. It is particularly effective when objects appear to melt into subsequent frames.
4. VHS and Analog Glitch
VHS-inspired glitch art recreates the imperfections associated with older analog video systems.
Typical characteristics include horizontal tracking errors, scan lines, color bleeding, image noise, and distorted timestamps.
Best for: Retro-futuristic artwork, nostalgic photography, music covers, and vintage-inspired digital designs.
How to use it: Combine scan lines with subtle color distortion rather than covering the image in excessive noise.
5. Databending
Databending involves manipulating the underlying data of a digital file using software or processes not originally intended for that file format.
For example, an artist might experiment with image data in an audio editor or manipulate file contents through a text editor.
Best for: Experimental digital art, abstract compositions, unpredictable visual textures, and conceptual artwork.
How to use it: Always work on copies of your original files. Incorrect manipulation can make files unreadable.
6. Digital Noise and Static
Digital noise and static imitate interference in electronic signals.
This style often uses random pixels, grain, scattered color patterns, and irregular visual textures.
Best for: Cyberpunk artwork, sci-fi posters, dark experimental graphics, and digital backgrounds.
How to use it: Use noise as a supporting texture. Too much visual interference can make the subject difficult to recognize.
7. Geometric and Pixel Displacement
This style breaks an image into rectangular sections, pixel blocks, or fragmented geometric shapes.
Individual sections are shifted, duplicated, stretched, or rearranged while the original subject remains partially recognizable.
Best for: Graphic design posters, fashion editorials, digital collages, and experimental branding.
How to use it: Use a consistent grid or geometric structure to make the distortion feel intentional.
How to Make Glitch Art: 7 Practical Steps
Creating glitch art does not require advanced programming skills. You can begin with a photograph, a digital illustration, or an AI-generated image and gradually introduce distortion.
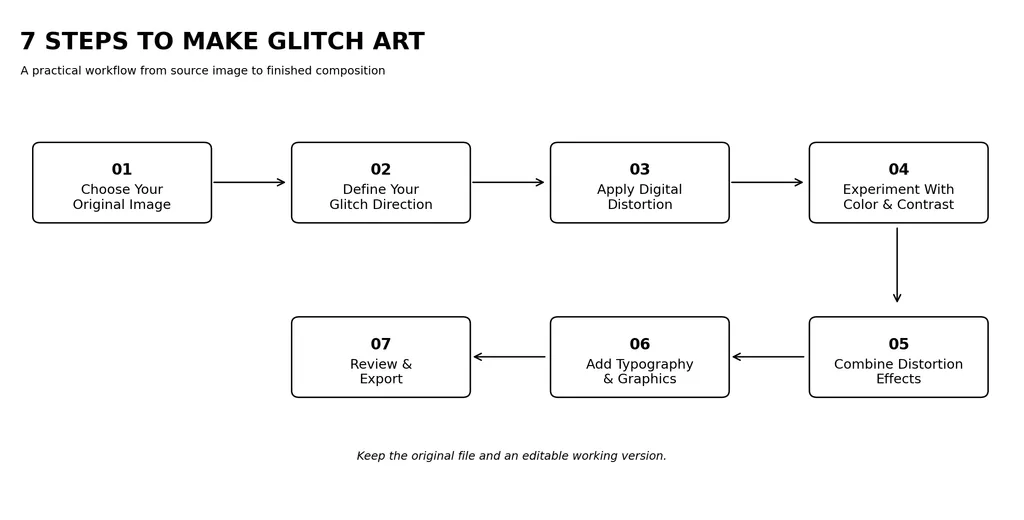
Step 1: Choose Your Original Image
Start with a visual that has a recognizable subject.
Good starting points include portraits, architecture, cityscapes, product photography, abstract illustrations, and typography-based compositions.
High-contrast images often make distortion easier to see because their edges provide clear visual references.
For a first project, try a portrait with a relatively simple background. This makes it easier to evaluate how different effects change the subject.
Step 2: Define Your Glitch Art Direction
Before applying effects, decide what kind of visual experience you want.
Creative Direction | Recommended Technique | Visual Result |
|---|---|---|
Futuristic | RGB splitting | Color-fringed edges |
Retro | VHS distortion | Analog interference |
Abstract | Pixel sorting | Stretched color patterns |
Experimental | Databending | Unexpected data artifacts |
Cyberpunk | Digital noise | Electronic textures |
Geometric | Pixel displacement | Fragmented image blocks |
Choose one dominant style before combining effects. This gives your composition a recognizable visual direction instead of making it look like a random collection of filters.
Step 3: Apply Digital Distortion
Start with one primary distortion technique.
For example, if you are creating an RGB glitch portrait:
- Duplicate the original image or separate its RGB channels.
- Select the red, green, or blue channel.
- Shift the selected channel horizontally or vertically.
- Adjust the displacement until colored edges become visible.
- Compare the distorted image with the original.
If you prefer a more abstract result, experiment with pixel sorting or geometric displacement.
Creative tip: Avoid applying the same distortion intensity everywhere. Leaving some areas relatively untouched creates contrast and helps preserve the subject.
Step 4: Experiment With Color and Contrast
Color is an important part of glitch art.
Common combinations include cyan and red for strong RGB separation, magenta and electric blue for futuristic compositions, green and black for computer-terminal aesthetics, purple and neon pink for cyberpunk visuals, and black and white for monochromatic digital distortion.
You can also experiment with saturation, contrast, and brightness to emphasize particular areas.
Step 5: Combine Multiple Distortion Effects
Once you have established your primary effect, introduce secondary visual elements.
For example:
- RGB separation combined with horizontal scan lines.
- Pixel displacement combined with digital noise.
- VHS distortion combined with color bleeding.
- Geometric fragmentation combined with duplicated typography.
The key is to establish a visual hierarchy. One technique should dominate while the others support the overall composition.
Step 6: Add Typography and Graphic Elements
Glitch art is frequently used in graphic design, so typography can become part of the composition.
Consider adding bold sans-serif headlines, duplicated or offset lettering, distorted numbers and symbols, small interface-inspired labels, and minimal geometric shapes.
Keep essential information readable. A visually interesting poster still needs a clear message.
Step 7: Review and Export Your Artwork
Before exporting, review the final composition.
Check whether the main subject remains identifiable, distortion effects look intentional, colors work together, typography remains readable, important details are not obscured, and the final dimensions match your intended platform.
Preserve the original image and an editable working file so you can return to earlier versions or adjust individual effects later.
A Practical Glitch Art Project: From Original Portrait to Cyberpunk Poster
Understanding individual techniques is useful, but combining them into a finished design is where the creative process becomes more interesting.
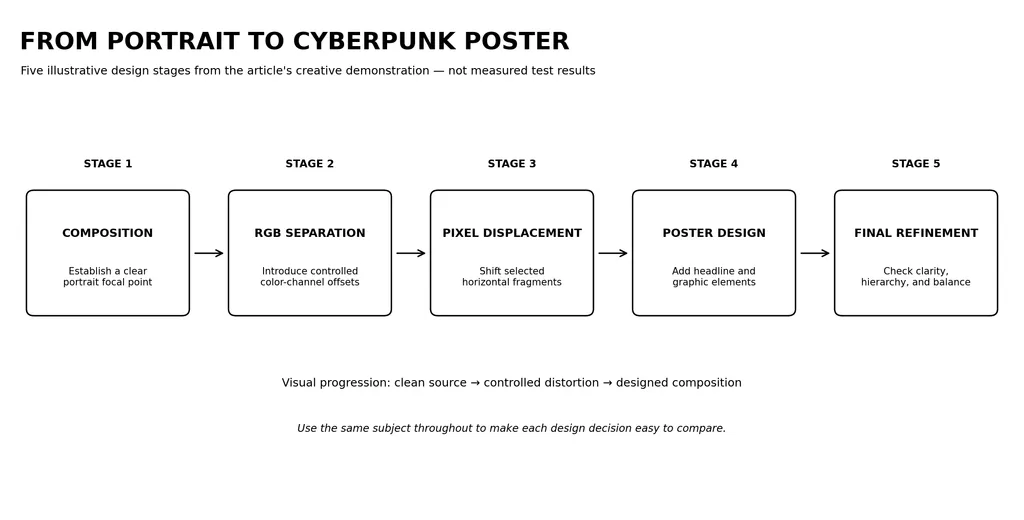
Let's walk through an illustrative design project: turning a conventional portrait into a futuristic cyberpunk poster.
The following is a creative demonstration workflow, not a documented software benchmark or a claim of measured results.
The Creative Brief
Project: Cyberpunk editorial poster
Starting image: A front-facing portrait against a dark background.
Creative direction: A futuristic visual identity that combines electronic interference, fragmented imagery, and neon typography.
Color palette: Cyan, magenta, black, and white.
Stage 1: Establish the Composition
Begin with the original portrait.
Keep the face near the center of the composition, leaving enough negative space for typography.
At this stage, the image should remain clean. You need a recognizable visual foundation before introducing distortion.
Stage 2: Introduce RGB Separation
Create subtle red and cyan offsets around the subject's silhouette.
Apply stronger separation around the shoulders and outer edges while keeping the central facial features relatively clear.
This produces the recognizable electronic interference associated with RGB glitch aesthetics.
Stage 3: Add Pixel Displacement
Introduce horizontal fragmented strips across selected areas of the portrait.
Vary their lengths and positions to create the impression of interrupted digital transmission.
Avoid covering the entire face with displaced blocks. The objective is to create controlled visual disruption.
Stage 4: Build the Poster Design
Add a bold headline, small technical labels, and geometric graphic elements.
For example:
- Main headline: DIGITAL DISRUPTION
- Supporting label: SIGNAL / ERROR / REPEAT
- Background: Dark charcoal with subtle electronic textures.
- Accent elements: Cyan lines and magenta fragments.
The typography should contrast with the distorted portrait rather than compete with it.
Stage 5: Refine the Final Composition
Review the poster at both full size and thumbnail size.
Ask three questions:
- Can viewers immediately identify the main subject?
- Does the distortion support the futuristic concept?
- Is the headline still readable?
If the answer to any question is no, reduce the relevant effects or adjust their placement.
The finished design should feel deliberately fragmented, not accidentally damaged.
How to Create Glitch Art With AI
AI-assisted image creation offers another way to explore glitch art.
Instead of manually adjusting every color channel or pixel, you can describe a visual direction and generate an initial composition. You can then refine the result through additional editing.
This approach is particularly useful for beginners who want to experiment with different glitch aesthetics without learning every technical technique first.
Step 1: Start With a Clear Visual Concept
Describe the subject, composition, color palette, and desired distortion.
Instead of writing:
Make a glitch art image.
Use a more specific creative direction:
Example AI Prompt:
Create an experimental glitch art portrait of a futuristic female character, with fragmented RGB channels, horizontal pixel displacement, sharp digital noise, cyan and magenta color accents, high-contrast lighting, and a dark technological background. Preserve recognizable facial features while introducing controlled digital distortion. Create a polished editorial composition with strong visual hierarchy.
This gives the image generator more information about what you want to achieve.
For more ideas on structuring effective AI design prompts, you can also explore different ways to describe visual subjects, composition, lighting, and style.
Step 2: Generate Different Visual Directions
Try variations of the same concept:
- A subtle RGB portrait.
- A heavily fragmented cyberpunk character.
- A retro VHS-inspired photograph.
- An abstract pixel-sorting composition.
Compare the results based on composition, color, distortion intensity, and subject clarity, rather than choosing an image simply because it contains the most effects.
Step 3: Refine the Image Instead of Starting Over
One challenge with generative image workflows is maintaining the original composition while changing only selected details.
Rather than repeatedly generating entirely new images, use iterative editing when the tool supports it.
For example, you might request:
- Increase the horizontal displacement.
- Reduce distortion around the face.
- Introduce stronger cyan and magenta separation.
- Preserve the original background.
- Add more visible pixel fragmentation.
The objective is to develop an existing visual direction rather than lose the original concept with every generation.
Step 4: Organize Your Creative Assets on a Canvas
For more involved projects, a canvas-based workflow can help organize reference images, generated variations, color directions, and final compositions in one workspace.
Virse approaches this process as a collaborative visual workspace rather than a simple prompt-and-result interface.
Its Infinite Canvas provides a shared workspace where human creators and AI agents can organize images, text, references, and connections. Designers can move around the canvas, group related assets, reuse images as references, and edit selected areas through supported inpainting and outpainting workflows.
For a glitch art project, a practical workflow could look like this:
- Collect references: Place portrait references, cyberpunk posters, color palettes, and glitch examples together.
- Establish the visual direction: Organize references around a consistent aesthetic, such as retro VHS or futuristic RGB distortion.
- Explore concepts: Use AI-assisted visual exploration to develop different compositions and distortion directions.
- Compare variations: Keep alternative results on the canvas and compare their color, composition, and visual hierarchy.
- Refine selected assets: Continue editing the preferred direction rather than treating each generation as an isolated result.
- Prepare the final composition: Organize the selected visual assets into a coherent poster or campaign direction.
The canvas also supports grouping related elements, batch operations, automatic layouts, and exporting grouped images. These capabilities are useful when a project involves several visual variations rather than one standalone image.
For example, a designer developing a cyberpunk campaign might need a poster, social media graphics, character portraits, and matching background visuals.
A shared visual workspace helps keep those creative decisions connected.
If you want to explore this type of workflow, try Virse. Registration provides free credits to get started. Paid plans offer unlimited use of a wide range of AI models and unlimited seats, making the workspace suitable for individual experimentation as well as collaborative creative projects.
One important distinction: AI-generated glitch effects and authentic file-level databending are not the same process. If your project requires actual manipulation of image or video data, use dedicated editing techniques.
Traditional Glitch Art vs. AI-Generated Glitch Art
Both approaches can produce compelling visual results, but they offer different levels of control and require different workflows.
Comparison | Traditional Glitch Art | AI-Generated Glitch Art |
|---|---|---|
Main process | Manual editing and data manipulation | Prompt-based image generation |
Creative control | Direct control over individual effects | Depends on model and editing capabilities |
Learning curve | Requires familiarity with editing tools | Easier to begin experimenting |
Pixel-level manipulation | Possible with appropriate tools | Not guaranteed |
Visual exploration | Often iterative and experimental | Useful for rapid concept exploration |
Reproducibility | Depends on the editing process | Depends on prompts, models, and references |
Best for | Technical experimentation and precise effects | Creative exploration and visual concepts |
Neither approach is universally better.
Choose traditional techniques when technical precision matters. Choose AI-assisted workflows when you want to explore visual directions quickly. You can also combine both approaches.
Best Tools for Creating Glitch Art
Different tools support different parts of the glitch art workflow. Your choice should depend on whether you want to manipulate individual pixels, create video distortion, or explore visual concepts.
Tool | Main Use | Best For |
|---|---|---|
Adobe Photoshop | Layer editing, channel separation, image distortion | Detailed image manipulation |
GIMP | Image editing and pixel-level adjustments | Free, hands-on editing |
Audacity | Experimental audio-based file manipulation | Databending experiments |
Video editing software | Frame manipulation and visual transitions | Motion-based glitch effects |
Virse | Canvas-based creative exploration and AI-assisted workflows | Organizing references and developing visual concepts |
A useful workflow is to combine tools rather than expect one application to handle every technique.
For example, you can use an AI-assisted canvas to explore the visual direction, an image editor for precise RGB adjustments, and a video editor for motion-based distortion.
Common Glitch Art Mistakes and How to Avoid Them
Even though glitch art embraces imperfection, effective compositions still require creative decisions.
Applying Too Many Effects
Combining every distortion effect at once can make an image look like random noise.
Solution: Choose one dominant technique and use secondary effects selectively.
Losing the Main Subject
Excessive distortion can make portraits, products, and other recognizable objects difficult to identify.
Solution: Preserve important facial features, silhouettes, or structural elements.
Using Inconsistent Colors
Random color combinations can weaken the overall composition.
Solution: Establish a limited color palette before applying effects.
Making Typography Unreadable
Distorted text can look interesting but may reduce the effectiveness of posters and promotional designs.
Solution: Keep essential headlines and supporting information readable.
Confusing AI Effects With Genuine Data Corruption
An AI-generated image may look corrupted without containing any actual corrupted digital data.
Solution: Distinguish visual imitation from technical manipulation when describing your creative process.
Frequently Asked Questions About Glitch Art
What is the difference between glitch art and digital art?
Digital art is a broad category of artwork created or modified using digital technologies. Glitch art is a specific approach within digital art that emphasizes errors, distortion, corrupted data, and technological imperfections as visual elements.
Do you need coding skills to create glitch art?
No. You can create glitch effects using image-editing software, graphic design tools, and AI image generators. Coding or direct file manipulation becomes useful when exploring more technical approaches such as databending and procedural pixel manipulation.
What software is commonly used for glitch art?
Artists use different tools depending on their techniques. Photoshop and GIMP can support image manipulation, while Audacity has been used in experimental databending workflows. Video editors and specialized processing tools can also create datamoshing and analog-style distortion.
How do you make a glitch effect on a photo?
Start with a photograph, duplicate its RGB channels, and shift selected channels horizontally to create color separation. You can then add scan lines, pixel displacement, digital noise, or compression artifacts. Keep some areas relatively clean so the original subject remains recognizable.
What is the difference between databending and datamoshing?
Databending manipulates the underlying data of a digital file, often using software not designed for that file type. Datamoshing specifically exploits video compression and frame information to produce unusual motion and image artifacts.
Can AI generate glitch art?
Yes. AI image generators can create images that visually imitate glitch aesthetics, including RGB separation, digital noise, fragmented pixels, and futuristic distortion. However, generated effects do not necessarily represent actual file corruption.
What makes good glitch art?
Good glitch art balances visual disruption with composition and intention. Strong examples usually have a recognizable focal point, a consistent visual direction, controlled distortion, and a clear relationship between the subject and the effects.
Can you make glitch art without an original photograph?
Yes. You can start with a digital illustration, typography, a 3D render, or an AI-generated image. Abstract shapes and geometric compositions are also useful starting points because they allow you to experiment with distortion without needing to preserve a recognizable subject.
Final Thoughts
Glitch art transforms digital imperfections into a creative visual language. From RGB separation and pixel sorting to databending and datamoshing, its techniques offer different ways to experiment with images, typography, and motion.
The best way to start is to choose a recognizable image, experiment with one distortion technique, and gradually introduce additional effects.
Whether you prefer hands-on editing or AI-assisted visual exploration, the goal is not simply to make an image look broken, but to make the distortion communicate something visually meaningful.
For designers developing more complex projects, combining reference images, visual experimentation, and iterative editing can also make it easier to maintain a consistent creative direction across multiple assets.
Written by Yifan Zhao — AI Design Workflow Strategist and Creative Technology Advisor.
References and Further Reading
- Kim Cascone, The Aesthetics of Failure: "Post-Digital" Tendencies in Contemporary Computer Music, Computer Music Journal, 2000.
- Rosa Menkman, The Glitch Moment(um), Institute of Network Cultures, 2011.
- Virse Canvas Documentation — Official documentation covering canvas navigation, elements, groups, editing, and export capabilities.