How to Use Kling 4.0: A Step-by-Step Video Guide
 Yifan Zhao12 min de lecture ·
The most reliable way to use Kling 4.0 is to treat it as a controlled shot-generation tool rather than a one-click film studio. Break a long idea into short shots, give each shot one primary action and one camera movement, then use reference images or keyframes when the character, product, or scene must remain consistent.
Kling 4.0 supports videos up to 30 seconds, multi-shot structures, sound, multilingual dialogue, and lip-sync experiments. However, long generations can lose motion near the ending, introduce unexpected cuts, add unwanted music, or change a character’s face and clothing. Our review of user questions and production examples shows that the biggest gains come from testing difficult shots early, separating visual generation from audio finishing, and replacing failed clips instead of regenerating an entire sequence.
Virse helps turn this process into a more flexible creative workflow. Its paid plans provide access to multiple models, including Veo 3.1, with unlimited use and unlimited seats for team collaboration, while new users can receive free credits after signing up. If you want to compare video models, prepare references, test visual directions, and manage Kling-style video experiments in one workspace, Virse gives you a practical way to move from exploration to production.
How to Use Kling 4.0 for Reliable Video Production
Kling 4.0 is most useful when the creative problem is clearly defined. It can produce energetic action, sharp visual details, product demonstrations, cinematic transitions, and short narrative scenes. It becomes less predictable when one prompt asks for many characters, several actions, multiple camera movements, and a complete story arc at the same time.
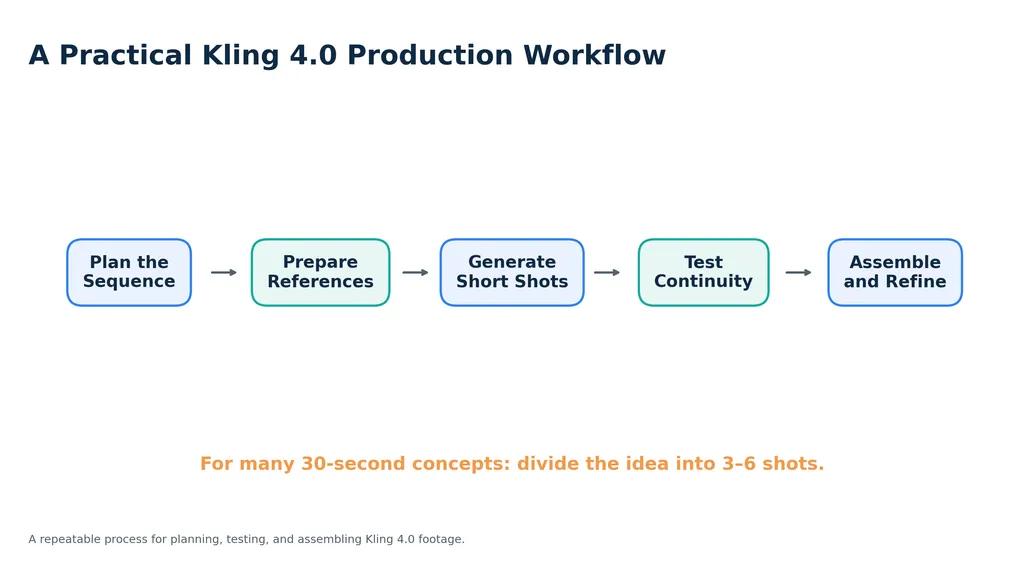
A dependable production structure is:
Plan the sequence → prepare references → generate short shots → test continuity → assemble and refine.
Our research and review of user questions identified several recurring problems:
- Motion becomes weaker during the second half of a 30-second clip
- The model cuts to a new scene without being asked
- Background music appears when dialogue or ambience was requested
- Faces, clothing, and objects change between shots
- Keyframe controls are difficult to understand
- Failed generations consume credits
- The newer interface can make previous generations harder to manage
The goal is not to generate the longest possible clip. The goal is to create enough usable footage with predictable control.
How Should You Write Kling 4.0 Prompts?
A practical Kling 4.0 prompt follows this order:
Subject → scene → camera → action → lighting → sound
Example:
A young chef in a white jacket stands in a modern test kitchen. Medium shot with a slow push toward the counter. She slices a red apple, looks up, and smiles briefly. Soft morning light enters through the windows. Natural knife sounds and quiet room ambience, with no music.
This order creates a clear hierarchy. The subject and scene establish what should remain stable. The camera defines the framing. The action defines what changes over time. Lighting and sound complete the shot.
Keep One Primary Action in Each Shot
A prompt that asks a character to walk through a room, open a door, pick up a phone, speak, turn around, and leave often produces incomplete movement. Kling may complete only the first action, slow down the final action, or replace the sequence with a camera push-in.
Divide the sequence into separate shots:
- The character walks toward the door.
- The character opens the door.
- The camera follows into the hallway.
- The character turns toward the light.
This method is especially useful for advertisements, tutorials, product demonstrations, and narrative videos where every action must remain editable.
Use One Main Camera Movement
Choose one dominant camera instruction:
- slow dolly in
- lateral tracking shot
- handheld follow shot
- locked-off close-up
- overhead crane movement
- controlled orbit around the subject
Avoid combining unrelated movements. A slow push-in combined with a crane, orbit, zoom, and handheld shake gives the model too many competing priorities. If the action is complex, simplify the camera rather than adding more descriptive language.
Describe the Ending Action
Many failed clips have a clear beginning but no defined ending. Add a final state such as:
- the character stops beside the window
- the product remains centered on the table
- the camera ends on a close-up of the label
- the runner exits the frame from the right
- the speaker looks directly into the lens
A defined ending helps prevent the final seconds from becoming an empty zoom or weak movement.
Should You Generate a 30-Second Kling 4.0 Video in One Attempt?
For most commercial and narrative projects, a 30-second idea should be divided into several shorter clips before final rendering.
Our review of user questions found a recurring pattern: the opening action looks convincing, but the second half becomes slower, less purposeful, or disconnected. Shorter shots give you more control over pacing and allow failed sections to be replaced individually.
Use this workflow:
- Write the complete 30-second concept.
- Divide it into three to six shots.
- Give each shot a duration and purpose.
- Test the most difficult shot first.
- Validate movement at a lower-cost setting.
- Regenerate approved shots at the desired quality.
- Assemble the final sequence in an editor.
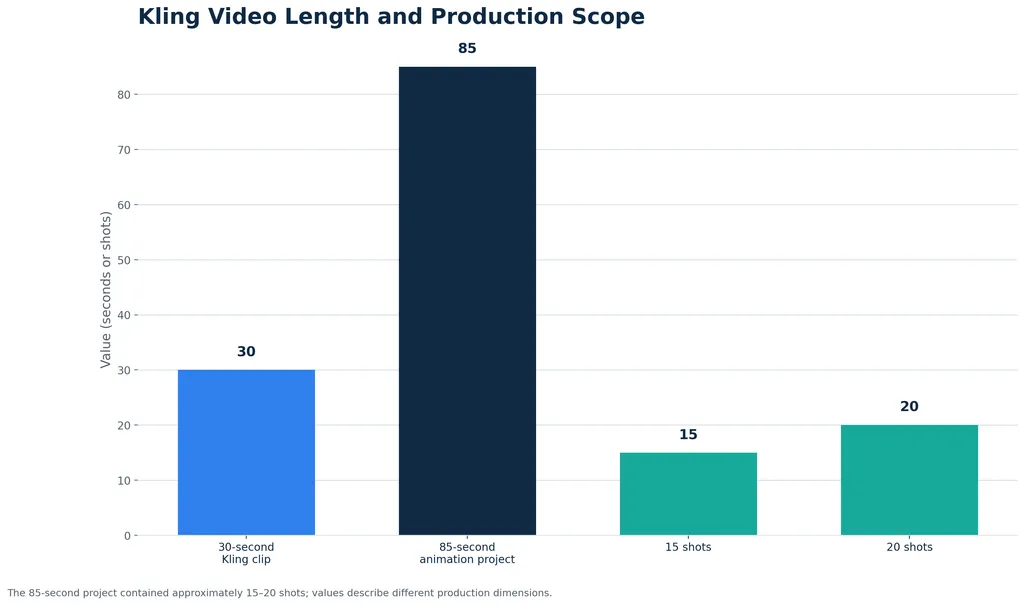
Case Study: An 85-Second Animation With 15–20 Shots
A professional CGI workflow provides a useful example. The project targeted approximately 85 seconds of realistic animation across 15–20 shots.
The initial idea was to generate the entire animation directly with Kling. The more controlled workflow used 3D software to establish composition and style frames, then used those stills as image-to-video references. Kling generated short motion segments, and editing software assembled the approved clips.
The project did not report a specific time or cost saving, so no efficiency claim can be made. Its value is structural: Kling was used as a controlled motion generator instead of being asked to complete an entire animation in one generation.
How Do Kling 4.0 Keyframes and Reference Images Work?
Start frames define how a shot begins. End frames define where the shot should arrive. Reference images help preserve the appearance of a character, product, or environment across multiple generations.
Use a start frame when:
- the opening composition must match an existing image
- a character must begin in a specific pose
- a product must appear in a fixed position
- the first frame must connect to a previous clip
Use an end frame when:
- the next shot needs a precise handoff
- a character must arrive at a defined position
- a transformation needs a controlled final state
- a camera transition must finish on a specific composition
A practical keyframe process is:
- Select or create the opening frame.
- Define fixed details such as clothing, lighting, and camera height.
- Describe the movement between the two states.
- Add an end frame only when the destination matters.
- Test the transition at a short duration.
- Check the final frame for changes in identity, scale, and background.
Keyframes are most valuable when continuity matters more than creative randomness.
Kling 4.0 Flash can be useful for fast experiments, but some workflow reports indicate that it may not provide the same level of start-and-end-frame control as a fuller keyframe workflow. When a transition is critical, choose the mode that gives you the clearest control over both endpoints.
How Can You Keep Characters Consistent in Kling 4.0?
Reference images improve consistency, but they do not guarantee an identical face, costume, or body shape. Character continuity depends on visual references, stable descriptions, and consistent shot design.
Prepare a character reference set with:
- front and three-quarter views
- hairstyle and facial features
- clothing colors and materials
- accessories
- approximate age and body proportions
- neutral lighting
- a simple background
Repeat fixed details in every important prompt. Avoid describing the same character as a “young woman,” “tired scientist,” and “fashion model” in different shots unless the change is intentional.
Keep a continuity record for each shot:
Continuity detail | What to record |
|---|---|
Character | Face, hair, clothing, accessories |
Environment | Location, time of day, background |
Camera | Shot size, lens feel, camera height |
Lighting | Direction, softness, color |
Action | What happened before and what happens next |
Objects | Position, scale, and condition |
Case Study: The AI Short Film PERSONA
An AI short film workflow used Kling for many of the main visual shots, while other tools supported character consistency, voice generation, and post-production. The wider pipeline included Kling, Veo, Nano Banana, ElevenLabs, and After Effects.
The project did not disclose a total runtime or production cost. Its practical lesson is still clear: multi-tool workflows can be more reliable when identity, voice, motion, and compositing require different forms of control.
How Do You Control Kling 4.0 Sound and Lip Sync?
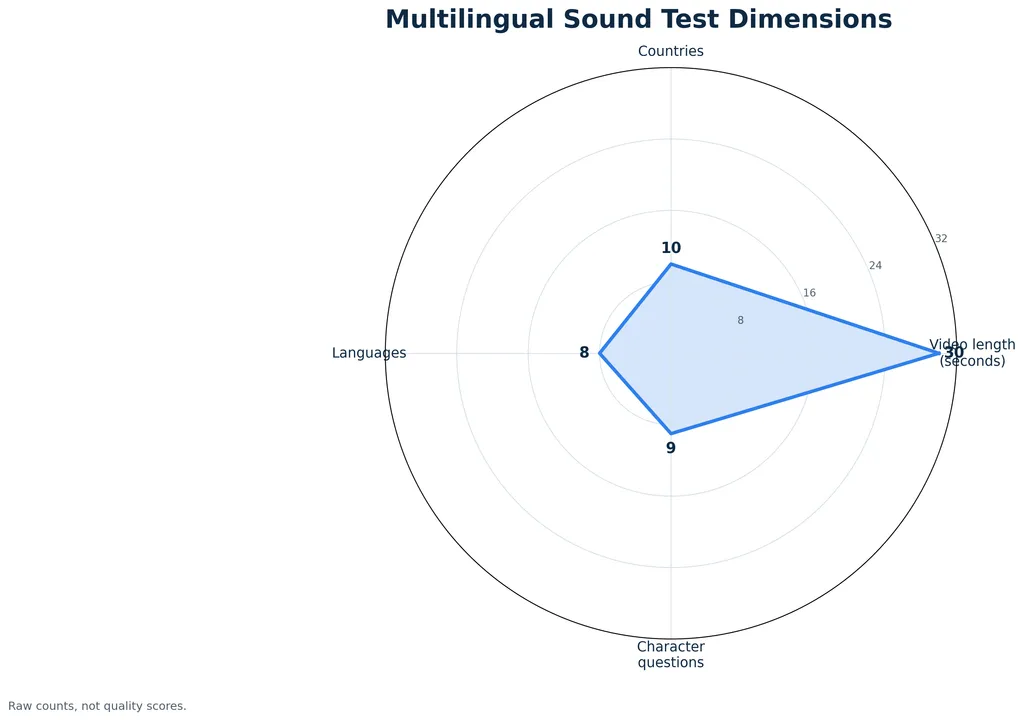
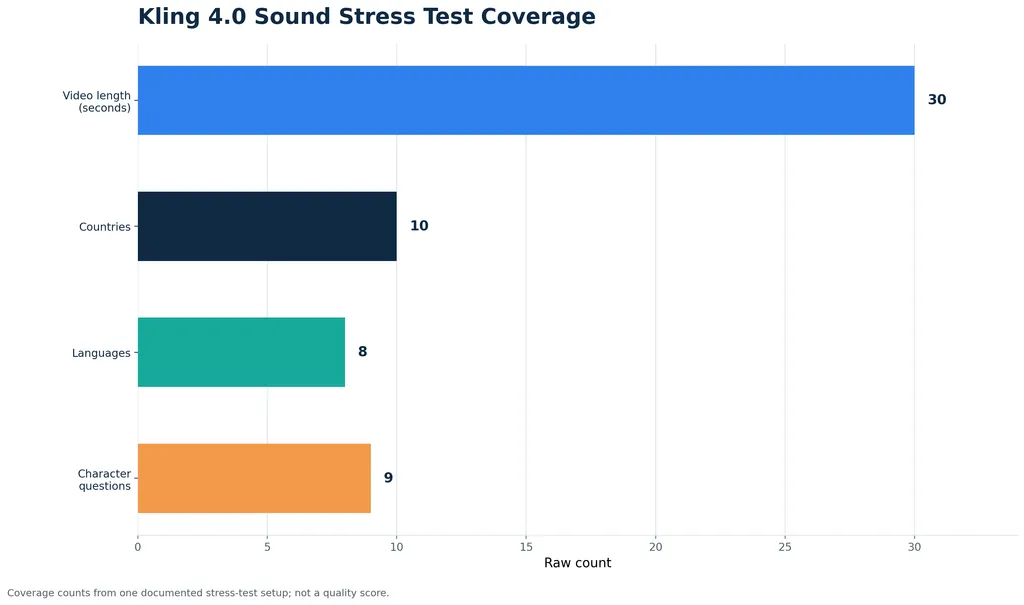
Kling 4.0 supports sound experiments, multilingual dialogue, and lip-sync generation. One documented stress test used a 30-second video connecting 10 countries, eight languages, and nine character questions through one continuous sound.
The sound worked as a narrative thread while the visual subjects changed between shots. This is a useful strategy when the same character does not need to remain on screen throughout the entire sequence.
For controlled audio, write specific instructions:
Dialogue only, no background music. Preserve natural room tone, footsteps, and the speaker’s voice.
Even with explicit instructions, unwanted music may appear. Our review of user questions suggests that creators often get more predictable results by treating sound as a separate finishing layer.
A practical division of work is:
- Kling for visual performance and basic lip movement
- a voice platform for controlled narration or dialogue
- an editor for timing, mixing, captions, and cleanup
For interviews, tutorials, and commercial clips, this separation reduces the risk that generated music will compete with important speech.
How Do You Prevent Unexpected Cuts and Weak Motion?
Unexpected cuts usually come from unclear timing, excessive scene changes, or conflicting camera instructions. Weak motion often appears when the model completes the main action before the clip ends.
To improve control:
- state that the shot is one continuous take when required
- specify the duration
- describe the opening, middle, and ending action
- avoid unrelated scene changes
- use a fixed camera when continuity matters most
- test the last five seconds separately
- shorten the clip if the action finishes too early
Do not solve every failed generation by adding more adjectives. A shorter prompt with one clear action is often more effective than a long paragraph containing several competing instructions.
Case Study: Editing One Variable at a Time
A video-editing workflow began with one stable base clip containing a person, animal, clothing, background, and dialogue. Each new generation changed only one element, such as the clothing, season, or background object.
This method makes it easier to determine whether Kling preserved the original motion and dialogue. It also prevents a failed result from becoming impossible to diagnose because too many variables changed at once.
Is Kling 4.0 Better Than Kling 3.0 or Seedance 2.5?
Model | Best suited to | Strengths | Limitations |
|---|---|---|---|
Kling 4.0 | Action, multi-shot concepts, visual effects | Strong motion, sharp detail, longer clips, sound features | Continuity drift, unexpected music, unstable long endings |
Kling 3.0 | Simple natural movement | Some creators find straightforward motion more stable | Shorter clips and more manual assembly |
Seedance 2.5 | Realistic people and dialogue | Natural emotion, group reactions, and lip sync | Less preferred for some high-energy action |
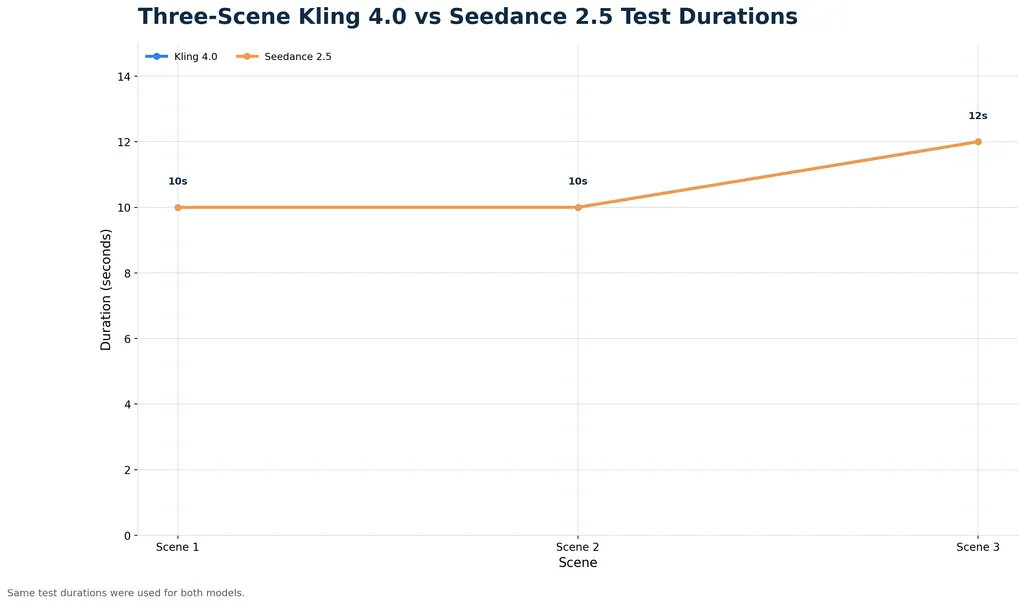
A controlled comparison used the same reference images, prompts, 720p resolution, 16:9 framing, and sound across three scenes lasting 10, 10, and 12 seconds.
Kling 4.0 produced clear movement, sharp details, and more readable clothing text. Seedance 2.5 produced more realistic faces, emotional reactions, and natural lip synchronization.
Choose according to the shot:
- Choose Kling 4.0 for energetic movement, action, product motion, and visual impact.
- Choose Seedance 2.5 for realistic acting, emotional dialogue, and documentary-style performance.
- Test Kling 3.0 when a simple movement needs a more predictable result.
A Complete Kling 4.0 Workflow for Commercial Projects
Use the following process when credits, continuity, and delivery deadlines matter:
- Define the project goal. Decide whether the video is a product ad, tutorial, short film, social clip, or presentation.
- Create a shot list. Record duration, framing, action, camera movement, and transition for every shot.
- Prepare reference images. Create character, product, and environment references before generating motion.
- Write structured prompts. Use the subject, scene, camera, action, lighting, and sound order.
- Test the hardest shot first. Identify continuity and motion problems before generating the full sequence.
- Start with a lower-cost test. Confirm composition and movement before final-quality rendering.
- Inspect the ending. Look for frozen motion, unexpected zooms, unwanted cuts, and audio problems.
- Regenerate failed shots only. Keep usable clips and replace individual failures.
- Assemble the sequence. Use Virse or another editor to organize references, clips, protected areas, and transitions.
- Finish sound and captions separately. Add controlled dialogue, music, ambience, subtitles, and final color adjustments.
Virse can support this process by helping organize reference images, compare iterations, define protected visual areas, and prepare visual direction before generation. Paid plans combine multiple models with unlimited use and unlimited seats, while new users can begin with free credits after registration.
Conclusion
Kling 4.0 is most effective when it is used as part of a controlled production workflow. Clear prompts, one primary action per shot, deliberate camera movement, reference images, keyframes, short tests, and separate audio finishing reduce the most common problems: motion loss, unexpected cuts, unwanted music, and character drift. For longer projects, generate approved shots individually and assemble them in post-production. This gives Kling room to handle motion and visual variation while keeping the final creative decisions under your control.
FAQ
How do I write a Kling 4.0 prompt?
Use the order subject, scene, camera, action, lighting, and sound. Keep one main action and one primary camera movement in each shot. Describe the final position or action so the clip has a clear ending.
Why does Kling 4.0 stop moving near the end?
The model may complete the main action before the clip ends. Shorten the shot, add a specific ending action, or divide the sequence into multiple clips.
How do I stop Kling 4.0 from adding music?
State “dialogue only, no background music” and specify the required ambience. If music still appears, remove or replace the audio during post-production.
Should I use keyframes or text-to-video?
Use keyframes when the opening or ending composition must match a specific image. Use text-to-video when you are exploring a shot and exact continuity is less important.
Is Kling 4.0 better than Seedance 2.5?
Kling is generally more suitable for energetic movement and sharp visual detail. Seedance may be stronger for realistic acting, emotional reactions, and natural lip sync. Test both when performance quality is central to the project.