
How to Create AI T-Shirt Mockups That Actually Match Your Product
 Yifan Zhao10 min read ·
The best way to create T-shirt mockups with AI is to start with the exact shirt you plan to sell, keep the original artwork unchanged, use AI to generate the model or scene, and verify the final print size and placement before publishing. This hybrid workflow gives you AI speed without sacrificing product accuracy.
The problem is that a photorealistic AI image can still show the wrong product. AI may change the neckline, fabric texture, color, logo, or print scale, creating product drift, and those errors become harder to manage when one design needs multiple colors, models, poses, and sales-channel formats.
Virse makes this workflow easier to scale. Paid plans include unlimited use of 40+ models such as Nano Banana 2 and GPT Image 2, plus unlimited team seats; Seedance 2.5, Seedance 2.0, and MiniMax H3 are also available on the model page. New users receive signup credits that can cover up to 10 Nano Banana 2 images or one Seedance 2.0 video, making it practical to test the workflow before expanding production.
What Makes an AI T-Shirt Mockup Accurate?
An AI T-shirt mockup is a product visualization created or enhanced with generative AI to show a design on a shirt, model, flat lay, studio setup, or lifestyle scene.
For ecommerce, realism is only half the job. The mockup must also represent the item a customer will receive.
I recommend separating the workflow into four layers:
Layer | Keep Controlled | Let AI Vary |
|---|---|---|
Product | Blank, fit, neckline, color | Model context |
Artwork | Text, logo, illustration | Ideally nothing |
Production | Print size and position | Ideally nothing |
Photography | Lighting, pose, styling, crop | Freely |
The core principle is simple: AI should control creative variation, not product truth.
Use the Exact T-Shirt Blank as the Reference
Start with the actual shirt model, not a generic “black T-shirt.”
Record the fit, collar, sleeves, fabric weight, color, front and back proportions, and print areas. In our review of apparel workflows, common failures included shirts appearing glossier than the real cotton blank, collars changing shape, and fitted garments becoming oversized.
If customers are buying a specific blank, AI should not be allowed to guess what that blank looks like.
Keep the Original Artwork as a Locked Asset
Typography, logos, illustrations, and brand colors should remain separate from the generative layer.
Our review of documented workflows repeatedly found three problems when AI recreated artwork directly: distorted lettering, color shifts, and inconsistent placement.
A safer system is:
Real garment reference + approved artwork + AI-generated photography
This preserves the product while still giving you creative freedom and stronger brand consistency.
How to Create T-Shirt Mockups With AI Step by Step
The most reliable workflow is not prompt-to-image. It is reference-to-variation.
Step 1: Prepare the Real Garment and Print Reference
Use an official POD preview, manufacturer image, blank product photo, or your own sample photography.
Record:
- shirt model and color
- print position
- printable area
- artwork width
- vertical offset
- front, back, or sleeve placement
This becomes the reference you use to judge every generated image.
Step 2: Generate the Model, Pose, and Scene
Once the product is controlled, use AI for the photography layer.
Define the model, pose, camera angle, lighting, environment, styling, and crop. A streetwear brand might use a boxy black tee, front-facing model, concrete setting, direct flash, and editorial framing. A minimalist shop might use soft daylight, neutral styling, and a clean waist-up composition.
The goal is not a longer prompt. It is clear separation between creative direction and product specifications, the same principle that improves broader AI graphic design workflows.
Step 3: Place the Original Artwork on the Shirt
Add the approved design after the scene is ready.
Photoshop gives strong control over perspective, masks, displacement, texture, and color correction. Canva can work for simpler compositions, while dedicated mockup tools can reduce manual setup.
For repeatable production, keep artwork and placement settings independent from the model image so you can change the scene without rebuilding the product.
Step 4: Match the Real Print Size and Placement
Do not resize artwork until it merely “looks right.”
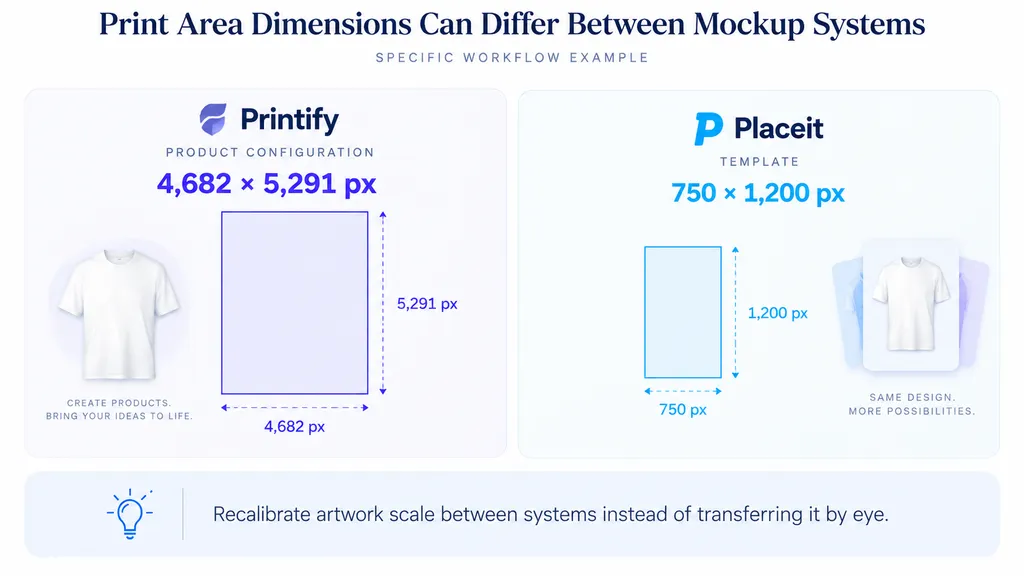
In one specific workflow we reviewed, a Printify product configuration used a 4682 × 5291 px print area, while a particular Placeit template used a 750 × 1200 px design area. Those dimensions are not platform-wide standards, but they demonstrate why artwork scale should be recalibrated between systems rather than transferred by eye.
Use real print width, print-area boundaries, collar distance, and center alignment as your reference.
Step 5: Use Different Rules for Different Print Positions
Left chest, center chest, full front, sleeve, back, and AOP designs need different positioning logic.
A left-chest mark requires controlled offsets and smaller dimensions. A full-front graphic depends on maximum printable width and vertical balance. Sleeve prints need rotation and garment geometry. AOP requires bleed and seam awareness.
Placement is a production rule, not a visual guess.
Step 6: Generate Variations, Review, and Export
After one accurate setup is established, generate variations in model, pose, background, lighting, crop, and campaign direction.
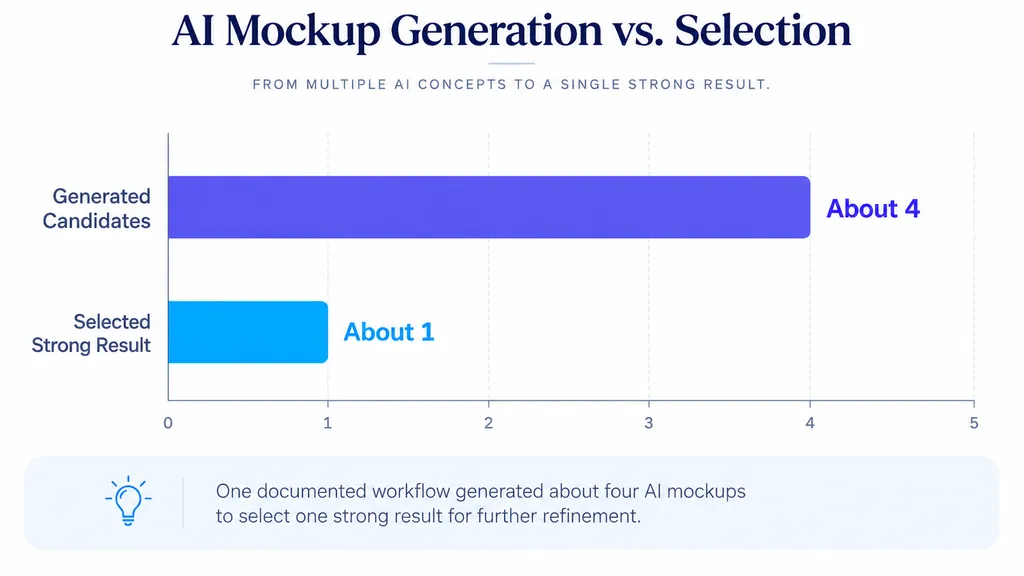
One documented workflow generated about four candidates to select one strong result. That is not an industry benchmark, but it shows why AI mockup production works better as a generate-and-curate process than a one-shot process.
Before publishing, compare the selected image with the official product preview or sample. Then retain a high-resolution master and export marketplace or social assets in the required dimensions.
How to Make AI T-Shirt Mockups Look Realistic Without Losing Accuracy
A strong mockup needs visual realism and product consistency at the same time.
Preserve Fabric Behavior Without Distorting the Design
Artwork should follow folds, perspective, and body curvature naturally. A completely flat graphic looks pasted on, but excessive warping can make the product inaccurate.
The best result uses enough deformation to follow the garment while preserving the original artwork.
Keep T-Shirt Colors Consistent
Generated lighting can make white shirts appear gray, black shirts look glossy, or saturated colors shift between images.
Some variation is acceptable in campaign photography, but ecommerce images should keep the underlying garment color recognizable. Compare AI outputs against the official blank throughout the process.
Generate Several Candidates Before Refining
Instead of polishing the first acceptable result, generate a small batch and compare them.
A practical sequence is:
Generate → select → verify → refine → export
This reduces time spent correcting weak generations and makes AI useful as a visual exploration system rather than a one-click replacement for quality control.
AI T-Shirt Mockup Case Studies and Workflow Data
The strongest lessons come from workflows that combine accuracy with repeatability.
Case Study 1: Four Candidates to Find One Strong Mockup
One documented apparel workflow generated four AI mockups and typically selected about one for further use.
The selected image was compared with the POD reference before additional colors or variants were created.
The important lesson is the process:
Generate → curate → compare → correct → expand
This is more reliable than generating once and publishing immediately.
Case Study 2: A 20-Hour Template Scaled Across Hundreds of Shirts
Another workflow invested at least 20 hours building a reusable PSD template with masks, fabric texture, color controls, and calibrated artwork placement.
That system was later reused across hundreds of shirts, with roughly five colors per product.
The value was not simply the template. It was turning one accurate setup into reusable infrastructure.
That is also where AI can create the most value: automating variation after product accuracy has already been established.
Case Study 3: Automated Mockups From One Artwork Upload
One automated workflow connected artwork upload, AI analysis, apparel instructions, image generation, and delivery.
The previous process required opening a mockup tool, choosing a template, importing artwork, resizing it, repositioning it, and exporting the result repeatedly.
Automation removed much of that repetitive work, but the workflow still needed controls for artwork distortion, color accuracy, and print placement.
Speed only helps when the production rules are correct.
Case Study 4: Five Mockup Candidates in About 20 Seconds
One documented workflow reported producing five image candidates in about 20 seconds from a product reference and contextual instructions.
This was a self-reported result rather than an independently verified benchmark, so it should be treated as an example of possible throughput.
The broader shift is more important: AI workflows increasingly optimize for fast batches of options that a designer can curate, rather than one manually produced mockup at a time.
How to Scale AI T-Shirt Mockups for POD and Ecommerce
Scaling is where AI becomes especially useful.
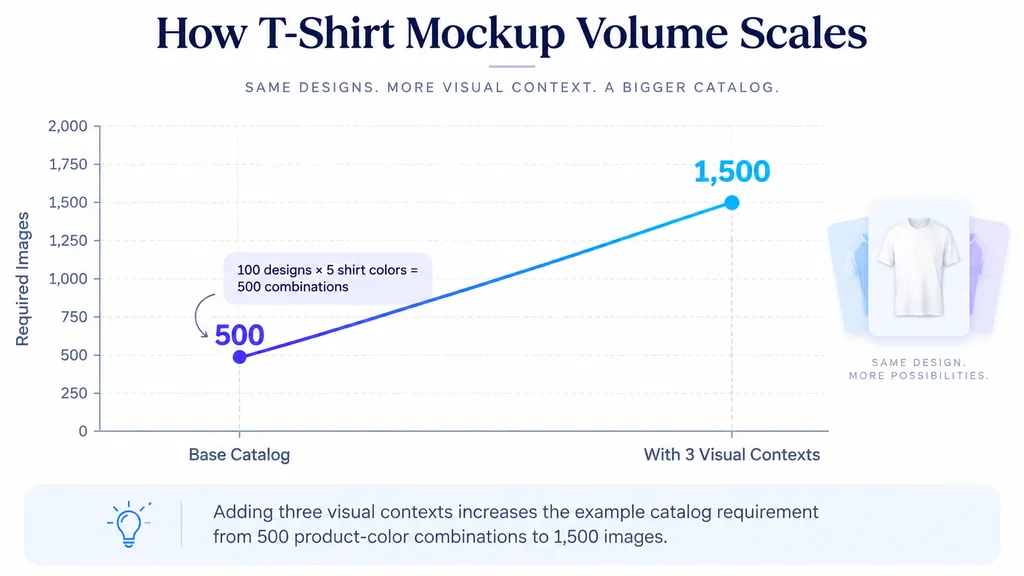
A catalog of 100 designs with five shirt colors already creates 500 product-color combinations. Add three model or lifestyle variations and that becomes 1,500 images.
Producing each image manually does not scale well.
A better system is:
Product reference → artwork → placement rules → visual direction → AI variations → QA
Build Reusable Brand Rules Before Automating
Define model style, camera distance, lighting, garment fit, crop ratio, color treatment, backgrounds, and print-position rules before introducing batch generation.
Once these constraints are stable, AI can produce variety without reinventing the brand language each time.
Use AI Agents for Repetitive Production
AI agents are most useful when they handle repeatable stages rather than final creative judgment.
One agent might analyze the artwork, another prepare visual variations, and another adapt outputs for different channels. The important part is that all of them share the same product and brand context.
This is also where Virse's canvas-based workflow fits naturally: references, assets, generated outputs, and project context can remain connected while multiple AI tasks are handled within the same creative environment.
Common AI T-Shirt Mockup Mistakes to Avoid
The biggest mistake is optimizing for an impressive image instead of an accurate product.
Avoid these problems:
- Letting AI redraw logos or typography: preserve the original artwork.
- Using a generic shirt instead of the real blank: match fit, collar, sleeves, fabric, and color.
- Guessing print size by eye: calibrate against production dimensions.
- Expecting one generation to be final: treat generation as exploration.
- Automating too early: lock product and placement rules before scaling.
- Using AI only as a template replacement: its greater value is generating controlled variations from one verified setup.
Conclusion
The best way to create T-shirt mockups with AI is to combine accurate product references with controlled generative variation. Start with the real garment, preserve the original artwork, define production-based print placement, use AI for models and environments, generate several candidates, and verify the strongest result before publishing. Across the workflows we reviewed, the same pattern appears repeatedly: the highest-value systems do not let AI reinvent the product; they use AI to turn one accurate setup into many consistent, brand-specific images with far less repetitive production work.
FAQ
How do I make AI T-shirt mockups match the exact blank I sell?
Use an official POD mockup, manufacturer image, or your own product photo as the garment reference. Keep the fit, collar, sleeves, fabric appearance, and color fixed. Let AI change the model, background, lighting, and styling rather than redesigning the shirt.
How do I stop AI from changing text, logos, or artwork colors?
Keep the approved artwork as a separate PNG or production asset and add it after generating the scene. Our review found recurring issues with distorted text, color shifts, and inconsistent placement when the artwork itself was regenerated.
How do I match Printify and Placeit mockup sizes?
Do not copy artwork scale visually. Compare the print-area dimensions and canvas proportions of the specific product and template you are using, then recalibrate the artwork. Different configurations can use very different working areas, so apparent percentage size alone is not reliable.
Can AI create left-chest, full-front, sleeve, and AOP mockups?
Yes, but each print position needs separate production rules. Left chest requires controlled offsets, full-front designs depend on maximum print width, sleeves require rotation and garment geometry, and AOP needs bleed and seam awareness. AI can generate the presentation layer, but the print specifications should remain fixed.
More from the Virse Blog
Workflow
How to Preserve Design Accuracy in AI Mockups Without Endless Cleanup
September 17, 2026 by Yifan Zhao
Workflow
How to Create Clothing Mockups That Look Real: 5 Practical Methods
September 17, 2026 by Yifan Zhao
Workflow
How to Keep Characters Consistent in GPT Image 2.5
September 16, 2026 by Yifan Zhao